Tag: Safety Tips

  • Tree Watering Tips During Summer: Complete 2026 Guide for Healthy Trees

    Tree Watering Tips During Summer: Complete 2026 Guide for Healthy Trees

    Tree Watering Tips During Summer:

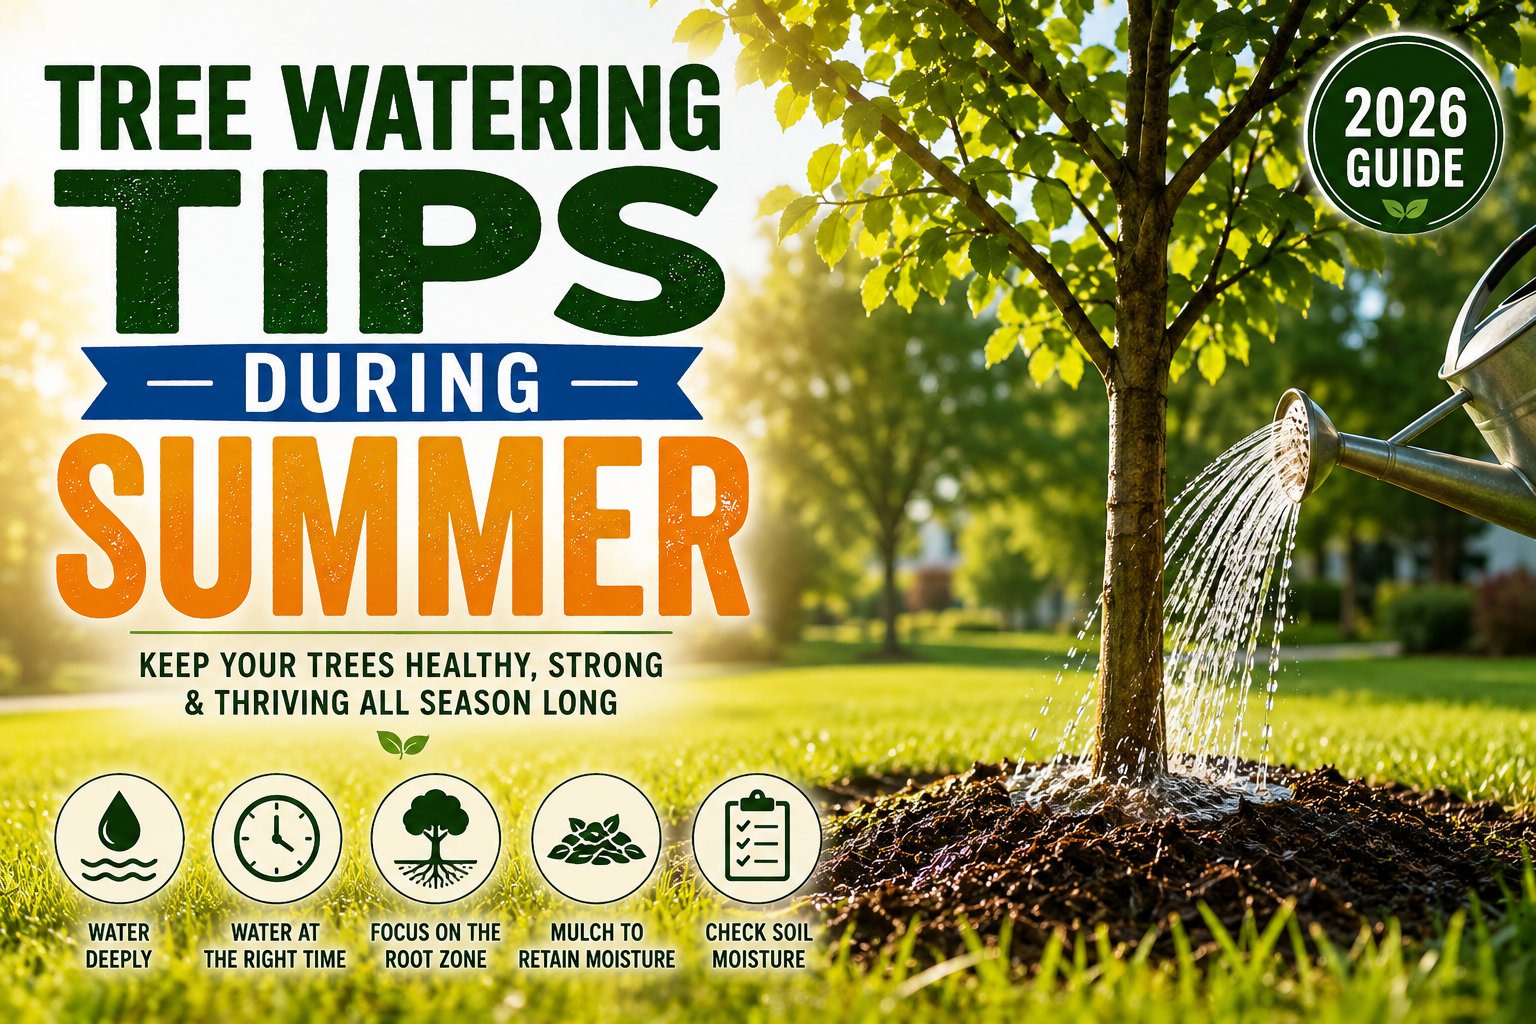
    Summer heat can put significant stress on trees, especially when temperatures rise and rainfall becomes inconsistent. Following the right Tree Watering Tips During Summer can help homeowners protect mature trees, young trees, and newly planted trees from drought stress, leaf scorch, and long-term damage.

    Why Summer Tree Watering Matters

    Trees lose moisture through their leaves during hot weather. When the soil around the root zone becomes too dry, roots may struggle to absorb enough water to support healthy growth. Young trees are particularly vulnerable because their root systems are not fully established.

    The goal is not simply to water more often. Effective Tree Watering Tips During Summer focus on delivering water deeply and consistently while avoiding conditions that keep the soil constantly saturated.
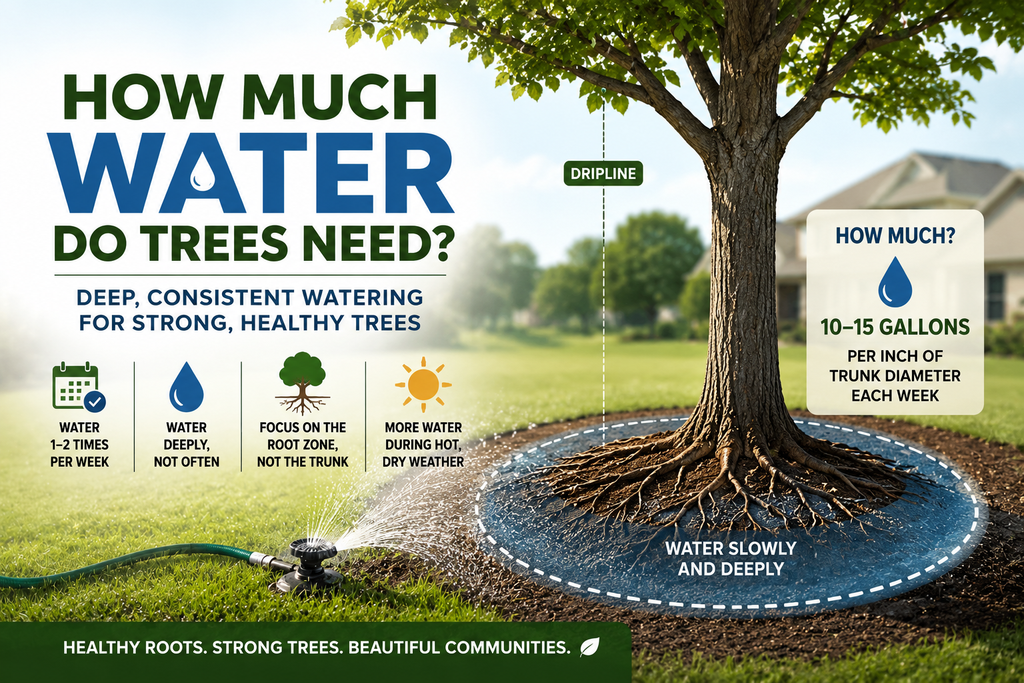
    How much water do trees need infographic showing a mature tree, root zone, dripline, hose, and recommended weekly watering amount for healthy tree growth.

    How Much Water Do Trees Need?

    Water requirements depend on tree species, age, soil type, weather, and location. A newly planted tree generally needs more frequent attention than an established tree. During prolonged heat or drought, mature trees may also require supplemental irrigation.

    Instead of following a fixed schedule, check the soil several inches below the surface. If it feels dry, watering may be necessary. If the soil remains damp, wait before adding more water. These simple Tree Watering Tips During Summer can prevent both underwatering and overwatering.

    Water Slowly and Deeply

    One of the most important principles is slow, deep watering. Applying a large amount of water quickly can cause runoff, especially in compacted or clay-heavy soil. Slow application gives water more time to move into the root zone.

    Use a soaker hose, drip irrigation system, or a garden hose with low water flow. Move the hose around the tree’s root zone instead of concentrating water against the trunk. Deep watering encourages roots to access moisture farther below the soil surface.

    Focus on the Root Zone

    Tree roots usually extend well beyond the trunk area. Avoid assuming that watering only at the base provides enough moisture. Apply water across the area beneath and beyond the canopy when practical.

    For young trees, keep the soil around the developing root ball consistently moist but not waterlogged. Established trees often benefit from watering across a wider area. These Tree Watering Tips During Summer are especially useful for trees growing in hot, dry regions of the United States.

    Choose the Right Time to Water

    Early morning is generally an excellent time to water trees because temperatures are cooler and evaporation is lower. Evening watering can also work, but avoid leaving foliage wet for extended periods when disease conditions are a concern.

    During extreme heat, monitor trees more frequently rather than automatically increasing watering every day. Weather forecasts, soil moisture, and tree condition should guide your schedule.

    Use Mulch to Protect Soil Moisture

    A layer of organic mulch can help reduce evaporation and moderate soil temperature. Apply mulch around the root zone, but keep it several inches away from the trunk. Avoid creating a thick mound directly against the bark.

    Mulching works alongside other Tree Watering Tips During Summer by helping the soil retain moisture between watering sessions. It can also reduce competition from grass and weeds around the tree.

    Watch for Signs of Water Stress

    Trees can show several signs when they are not receiving enough moisture. Wilting leaves, premature leaf drop, dry soil, leaf scorch, and slowed growth may indicate drought stress. However, overwatering can produce similar symptoms, including yellowing leaves and declining roots.

    Inspect the soil before watering and look for changes in the tree’s overall appearance. If a tree shows severe or persistent stress, consider contacting a certified arborist for professional evaluation.

    Avoid Common Watering Mistakes

    One common mistake is watering too frequently but too shallowly. Another is relying on rainfall alone during extended dry periods. Watering directly against the trunk can also contribute to bark problems.

    Homeowners should also avoid excessive irrigation after heavy rain. Good drainage is essential because saturated soil can limit oxygen around roots. Following practical Tree Watering Tips During Summer means adjusting your routine according to actual conditions rather than using the same schedule throughout the season.

    Summer watering tips for U.S. homeowners showing a sprinkler watering a healthy lawn and garden in a sunny suburban yard.

    Summer Watering Tips for U.S. Homeowners

    Watering needs can vary across the United States. Trees in hot, dry areas may need more supplemental water, while homeowners in regions receiving regular summer rainfall may need less. Local soil conditions and water restrictions should also be considered.

    In areas affected by drought, prioritize newly planted and vulnerable trees while following local watering regulations. The most effective Tree Watering Tips During Summer combine careful observation, efficient irrigation, mulch, and appropriate timing.

    Final Thoughts

    Healthy trees need consistent care throughout the hottest months. By checking soil moisture, watering deeply, protecting the root zone with mulch, and watching for stress, homeowners can improve tree health and resilience.

    The best Tree Watering Tips During Summer are practical rather than complicated. Adjust watering according to temperature, rainfall, soil conditions, and tree age, and seek professional help when a tree shows serious signs of decline. With the right approach, U.S. homeowners can help their trees remain strong and healthy throughout summer and beyond.

  • Tree Fertilization Guide: Complete Guide for Healthy Trees in 2026

    Tree Fertilization Guide: Complete Guide for Healthy Trees in 2026

    Tree Fertilization Guide

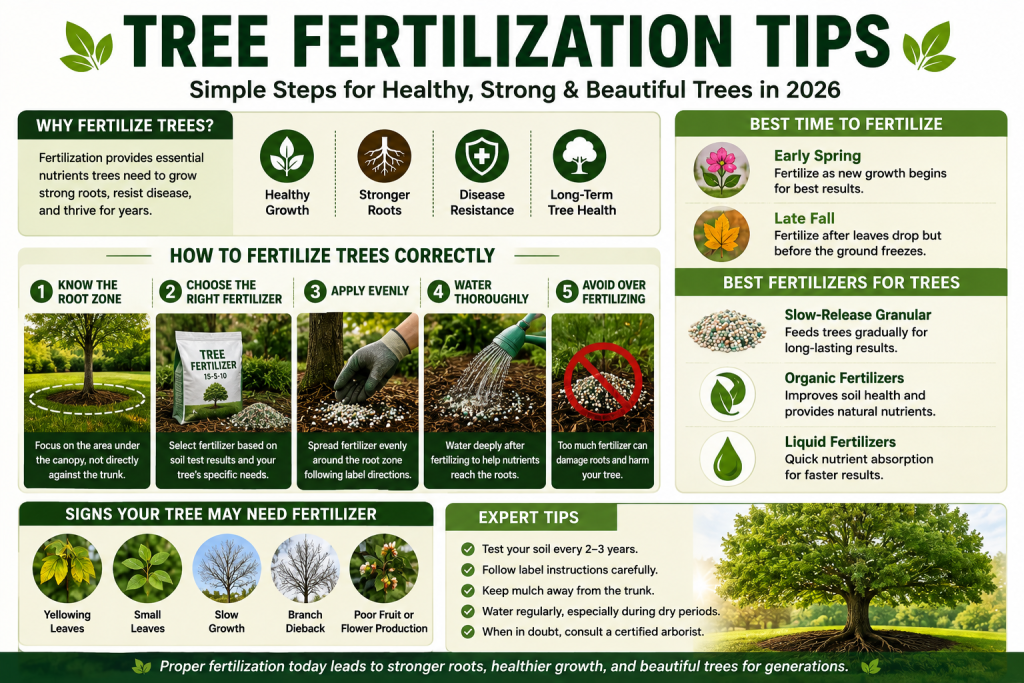
    Healthy trees are a valuable part of any landscape. They provide shade, improve air quality, increase property value, and enhance curb appeal. However, many homeowners overlook one essential aspect of tree care: proper fertilization. A well-planned Tree Fertilization Guide can help trees grow stronger, resist disease, and thrive throughout the year.

    Whether you have ornamental trees, shade trees, or fruit-bearing varieties, understanding how and when to fertilize is critical. This comprehensive Tree Fertilization Guide is designed specifically for US homeowners who want healthier and more resilient trees in 2026 and beyond.

    Why Tree Fertilization Matters

    Trees require nutrients to support healthy growth. While natural soil contains essential nutrients, these resources can become depleted over time due to weather conditions, construction activities, lawn competition, and repeated plant growth.

    The three primary nutrients trees need are:

    • Nitrogen (N): Promotes leaf and branch growth.
    • Phosphorus (P): Supports root development.
    • Potassium (K): Enhances overall tree health and disease resistance.

    Following a proper Tree Fertilization Guide helps replenish these nutrients and supports long-term tree vitality.

    Signs Your Tree May Need Fertilizer

    Not every tree requires fertilization every year. However, several warning signs may indicate nutrient deficiencies:

    Slow Growth

    Trees that grow less than expected each season may lack essential nutrients.

    Yellowing Leaves

    Leaves that become pale green or yellow during the growing season can signal nutrient shortages.

    Small Leaves

    Reduced leaf size often indicates poor soil fertility.

    Branch Dieback

    Weak branches and declining canopy growth may suggest nutritional stress.

    Poor Flower or Fruit Production

    Fruit and flowering trees often show reduced productivity when nutrients are lacking.

    If you notice these symptoms, it may be time to follow a proven Tree Fertilization Guide to restore tree health.

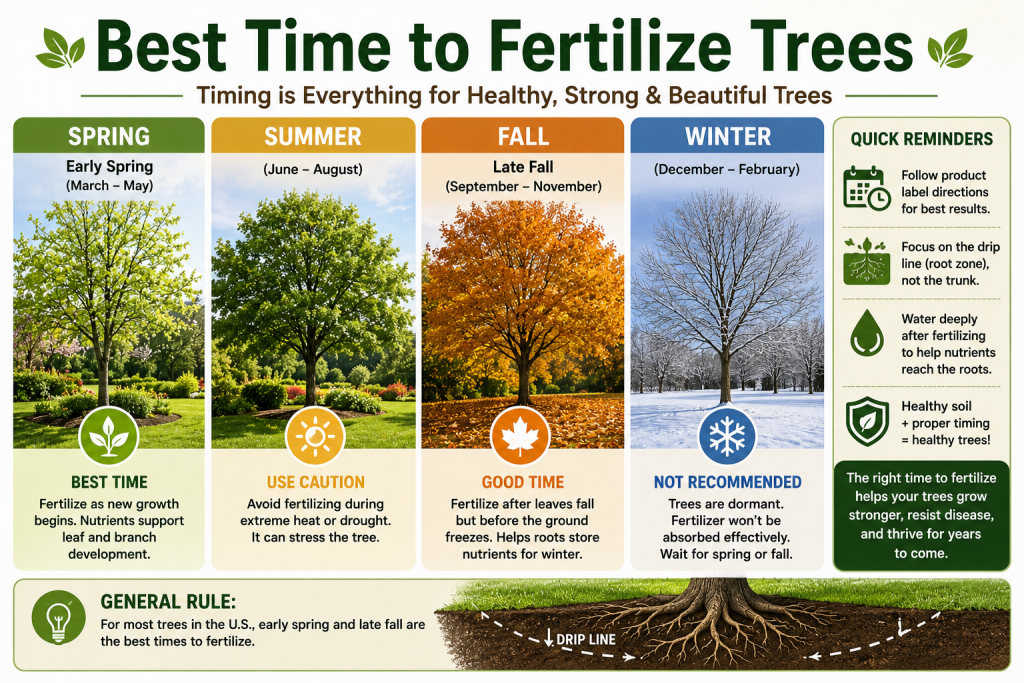
    Best time to fertilize trees infographic showing spring, summer, fall, and winter tree fertilization schedule

    Best Time to Fertilize Trees

    Timing plays a major role in successful fertilization.

    Early Spring

    Spring is often considered the ideal time to fertilize trees because nutrients support new growth as the growing season begins.

    Late Fall

    Many arborists also recommend fertilizing in late fall after leaves have dropped but before the ground freezes.

    Avoid Mid-Summer Stress Periods

    Fertilizing during extreme heat can place additional stress on trees, especially in southern US states.

    A strategic schedule is one of the most important parts of any effective Tree Fertilization Guide.

    Choosing the Right Tree Fertilizer

    Different trees have different nutritional requirements. The most common fertilizer options include:

    Slow-Release Granular Fertilizer

    Slow-release products provide nutrients gradually over time and are often preferred for landscape trees.

    Organic Fertilizers

    Organic options improve soil structure while supplying nutrients naturally.

    Liquid Fertilizers

    These provide faster nutrient availability but may require more frequent applications.

    Specialized Tree Fertilizers

    Some products are designed specifically for flowering trees, evergreens, or fruit trees.

    Before applying fertilizer, consider conducting a soil test to determine the exact nutrient needs of your landscape.

    How to Fertilize Trees Correctly

    Applying fertilizer properly is just as important as selecting the right product.

    Step 1: Measure the Root Zone

    Focus on the root zone beneath the tree canopy rather than applying fertilizer directly against the trunk.

    Step 2: Calculate the Amount Needed

    Follow manufacturer recommendations carefully to avoid over-fertilization.

    Step 3: Distribute Evenly

    Spread fertilizer uniformly throughout the root area.

    Step 4: Water Thoroughly

    Watering helps nutrients move into the soil where roots can absorb them.

    Following these simple steps ensures your Tree Fertilization Guide produces the best possible results.

    Common Tree Fertilization Mistakes

    Many homeowners unintentionally damage trees through improper fertilization practices.

    Avoid these common mistakes:

    • Applying too much fertilizer
    • Fertilizing unhealthy or severely stressed trees
    • Ignoring soil testing
    • Applying fertilizer directly against the trunk
    • Using lawn fertilizer around trees without checking nutrient content
    • Fertilizing during drought conditions without adequate watering

    A balanced Tree Fertilization Guide focuses on supporting healthy growth rather than forcing excessive growth.

    Tree fertilization tips infographic showing nutrient application and healthy tree growth

    Organic Tree Fertilization Tips

    Organic tree care continues to gain popularity among environmentally conscious homeowners.

    Consider these natural options:

    • Compost
    • Aged manure
    • Leaf mold
    • Organic mulch
    • Compost tea

    These materials gradually improve soil health while supplying nutrients that support sustainable tree growth.

    Benefits of Proper Tree Fertilization

    A well-executed Tree Fertilization Guide provides numerous advantages:

    • Stronger root systems
    • Improved disease resistance
    • Better drought tolerance
    • Healthier foliage
    • Enhanced flowering and fruit production
    • Increased longevity
    • Improved property value

    Healthy trees contribute significantly to both residential landscapes and local ecosystems.

    Should You Hire a Professional Arborist?

    While many homeowners can fertilize trees themselves, certain situations may require professional assistance.

    Consider hiring a certified arborist if:

    • Large mature trees are declining
    • Soil conditions are poor
    • Nutrient deficiencies are severe
    • You need professional soil analysis
    • Valuable landscape trees require specialized care

    Professional arborists can develop customized fertilization programs tailored to your specific tree species and local soil conditions.

    Conclusion

    A reliable Tree Fertilization Guide is one of the most valuable resources for maintaining healthy trees in your landscape. By understanding nutrient requirements, choosing the right fertilizer, applying it correctly, and avoiding common mistakes, homeowners can significantly improve tree health and longevity.

    As we move through 2026, proper tree fertilization remains a key component of responsible landscape management across the United States. Healthy, well-nourished trees not only beautify your property but also provide environmental benefits that can last for generations.

  • Emergency Tree Service Cost in 2026: Average Prices & Homeowner Guide

    Emergency Tree Service Cost in 2026: Average Prices & Homeowner Guide

    Emergency Tree Service Cost (2026): Complete Guide for US Homeowners

    When a tree suddenly falls after a severe storm or begins leaning dangerously toward your home, waiting is not an option. Understanding the Emergency Tree Service Cost helps homeowners prepare for unexpected situations and avoid paying more than necessary during an emergency.

    In the United States, emergency tree services are available 24/7 to remove hazardous trees, clear blocked driveways, and protect homes from further damage. This guide explains average pricing, factors affecting costs, and practical ways to reduce expenses in 2026.


    What Is Emergency Tree Service?

    Emergency tree service refers to immediate tree removal or stabilization when a tree creates a safety hazard. These situations usually involve:

    • Trees damaged by storms
    • Trees falling on homes or garages
    • Large branches blocking roads or driveways
    • Lightning-damaged trees
    • Trees leaning dangerously after heavy winds

    Professional arborists use specialized equipment to remove hazardous trees safely while minimizing additional property damage.


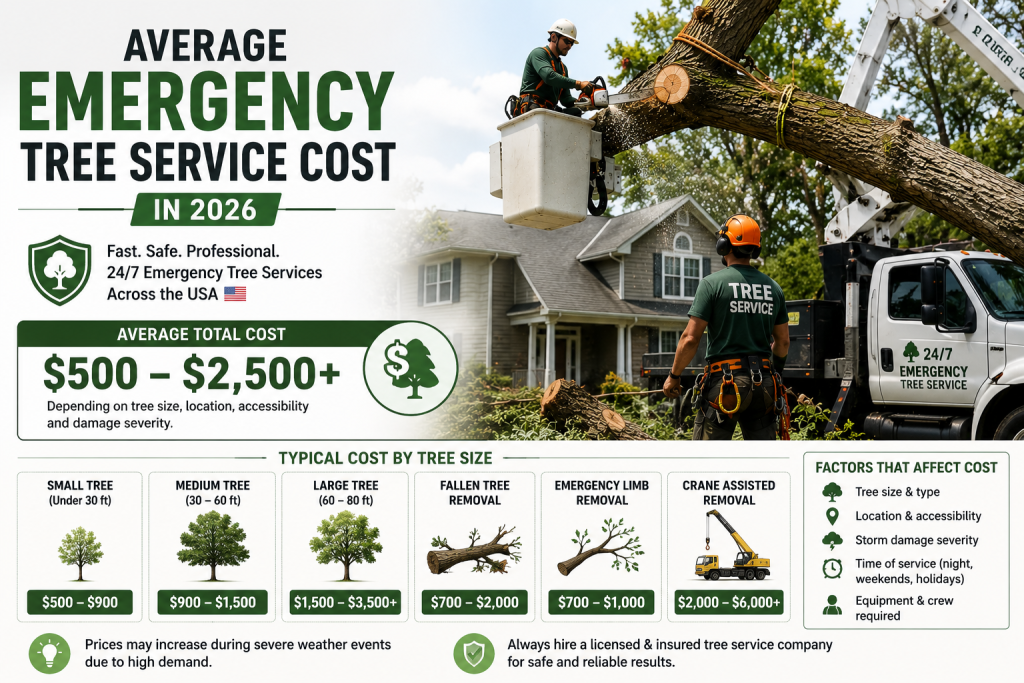
    Infographic showing the average emergency tree service cost in 2026, with professional arborists removing a storm-damaged tree using a bucket truck near a suburban US home, including estimated tree removal price ranges and key cost factors.

    Average Emergency Tree Service Cost in 2026

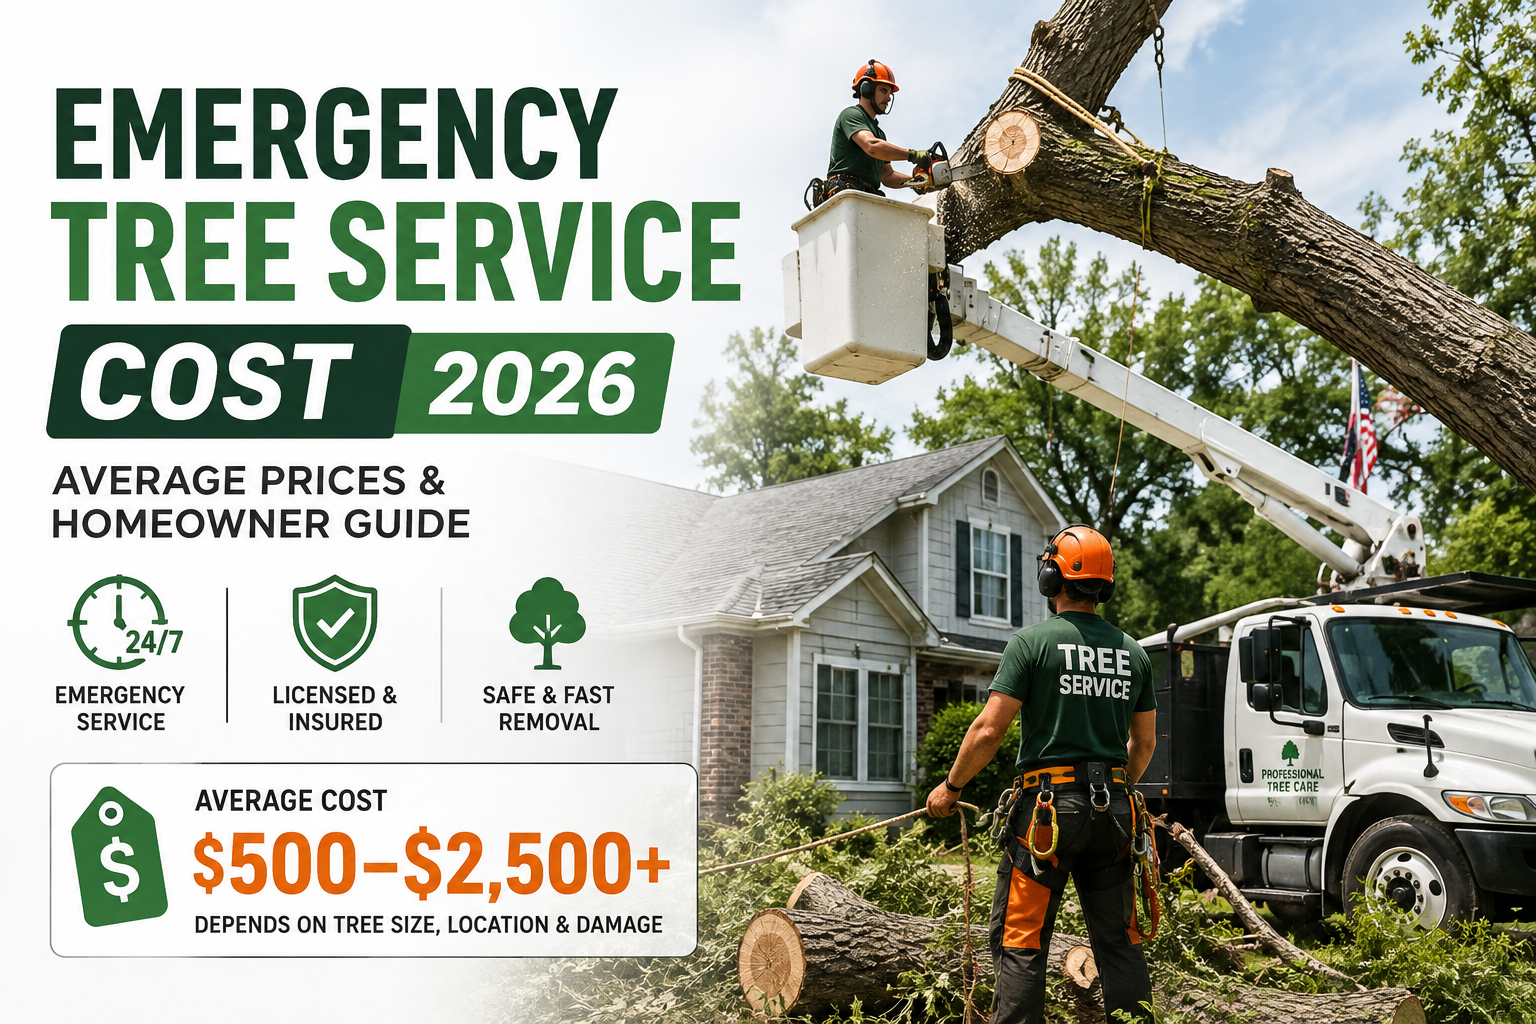
    The average Emergency Tree Service Cost in the United States ranges from $500 to $2,500, depending on the size of the tree, location, accessibility, and urgency.

    Typical price ranges include:

    ServiceAverage Cost
    Small emergency tree removal$500–$900
    Medium tree removal$900–$1,500
    Large tree removal$1,500–$3,500+
    Fallen tree removal$700–$2,000
    Emergency limb removal$300–$1,000
    Crane-assisted removal$2,000–$6,000+

    The final Emergency Tree Service Cost may increase during severe weather events when demand is extremely high.


    Factors That Affect Emergency Tree Service Cost

    Several factors influence the total Emergency Tree Service Cost.

    Tree Size

    Larger trees require more labor, equipment, and cleanup, resulting in higher costs.

    Tree Location

    Trees close to homes, power lines, fences, or swimming pools require extra care and specialized removal techniques.

    Storm Damage

    Broken or unstable trees are more dangerous to remove than healthy standing trees.

    Accessibility

    Limited yard access may require cranes or bucket trucks, increasing the Emergency Tree Service Cost.

    Time of Service

    Emergency calls during nights, weekends, or holidays often include additional service fees.


    Does Homeowners Insurance Cover Emergency Tree Service?

    Many homeowners insurance policies may help cover Emergency Tree Service Cost if the tree falls because of a covered event such as:

    • Windstorms
    • Lightning
    • Heavy snow
    • Ice storms

    Insurance often pays when a tree damages an insured structure like a home or garage. However, removal of trees that simply fall into the yard without causing damage may not always be covered.

    Always contact your insurance company before scheduling major emergency work.


    How to Save Money on Emergency Tree Service

    Although emergencies cannot always be avoided, homeowners can reduce the overall Emergency Tree Service Cost by following these tips:

    • Schedule regular tree inspections.
    • Remove hazardous trees before storm season.
    • Compare estimates from licensed companies.
    • Verify insurance and certifications.
    • Ask about cleanup costs before work begins.

    Preventive maintenance is often far less expensive than emergency removal.


    Why You Should Hire Professionals

    Emergency tree removal is one of the most dangerous landscaping jobs. Attempting to remove a damaged tree without proper equipment can result in serious injuries and costly property damage.

    Professional tree service companies provide:

    • 24/7 emergency response
    • Licensed and insured crews
    • Specialized safety equipment
    • Crane and bucket truck services
    • Complete debris removal

    Hiring experienced professionals ensures the job is completed safely and efficiently.


    Signs You Need Emergency Tree Service Immediately

    Call a professional immediately if you notice:

    • A tree leaning suddenly after a storm
    • Large cracked branches hanging overhead
    • A tree touching power lines
    • Roots lifting from the ground
    • A tree resting on your roof or vehicle

    Ignoring these warning signs can increase both safety risks and the overall Emergency Tree Service Cost due to worsening damage.


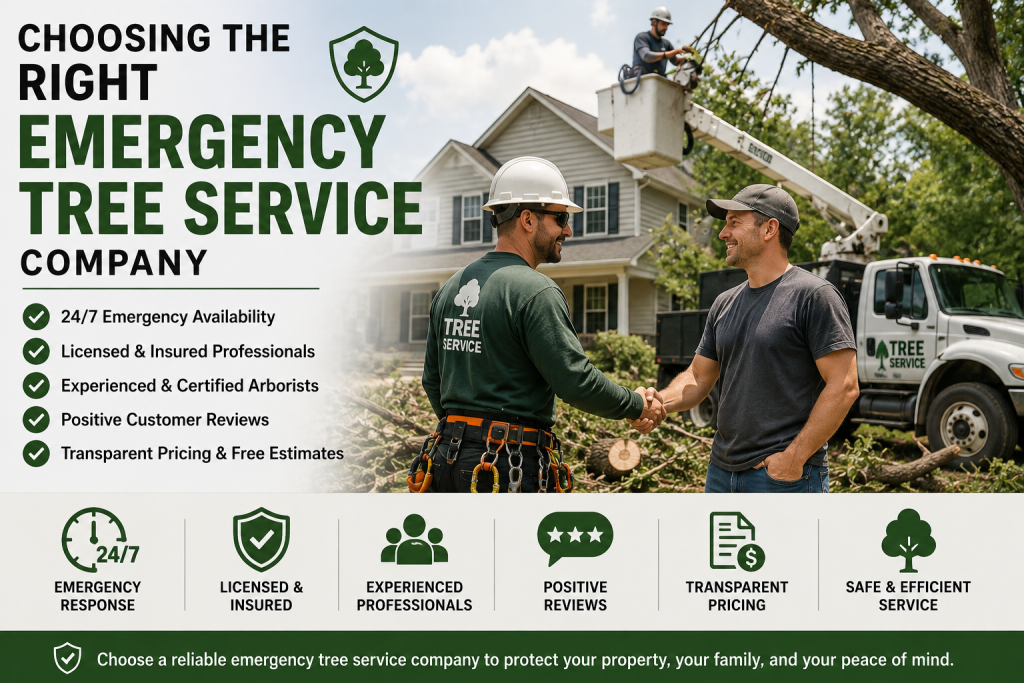
    Professional arborist shaking hands with a homeowner after discussing emergency tree removal services, with a bucket truck and tree crew in the background, illustrating how to choose the right emergency tree service company in the USA.

    Choosing the Right Emergency Tree Service Company

    Before hiring a contractor, look for:

    • Licensed and insured professionals
    • ISA Certified Arborists
    • Positive customer reviews
    • Transparent pricing
    • Written estimates
    • 24-hour emergency availability

    A reputable company will explain the work, provide a clear estimate, and prioritize safety.


    Conclusion

    Understanding Emergency Tree Service Cost allows homeowners to make informed decisions during stressful situations. While prices vary based on tree size, location, and urgency, hiring qualified professionals helps protect your family and property. Regular inspections, preventive maintenance, and quick action after storms can reduce long-term expenses and keep your landscape safe throughout 2026.


    Frequently Asked Questions

    1. What is the average Emergency Tree Service Cost?

    Most homeowners pay between $500 and $2,500, depending on the situation.

    2. Does insurance cover emergency tree removal?

    It often does if a covered storm causes damage to an insured structure.

    3. Why is emergency tree service more expensive?

    Emergency response requires immediate availability, specialized equipment, and additional safety precautions.

    4. Can I remove a fallen tree myself?

    Large or damaged trees should always be handled by trained professionals for safety reasons.

    5. How can I lower emergency tree removal costs?

    Regular tree maintenance and early removal of hazardous trees can help reduce future emergency expenses.

  • Fallen Tree on House: Complete Guide US Homeowners (2026)

    Fallen Tree on House: Complete Guide US Homeowners (2026)

    Fallen Tree on House: What to Do After a Tree Falls on Your Home in 2026

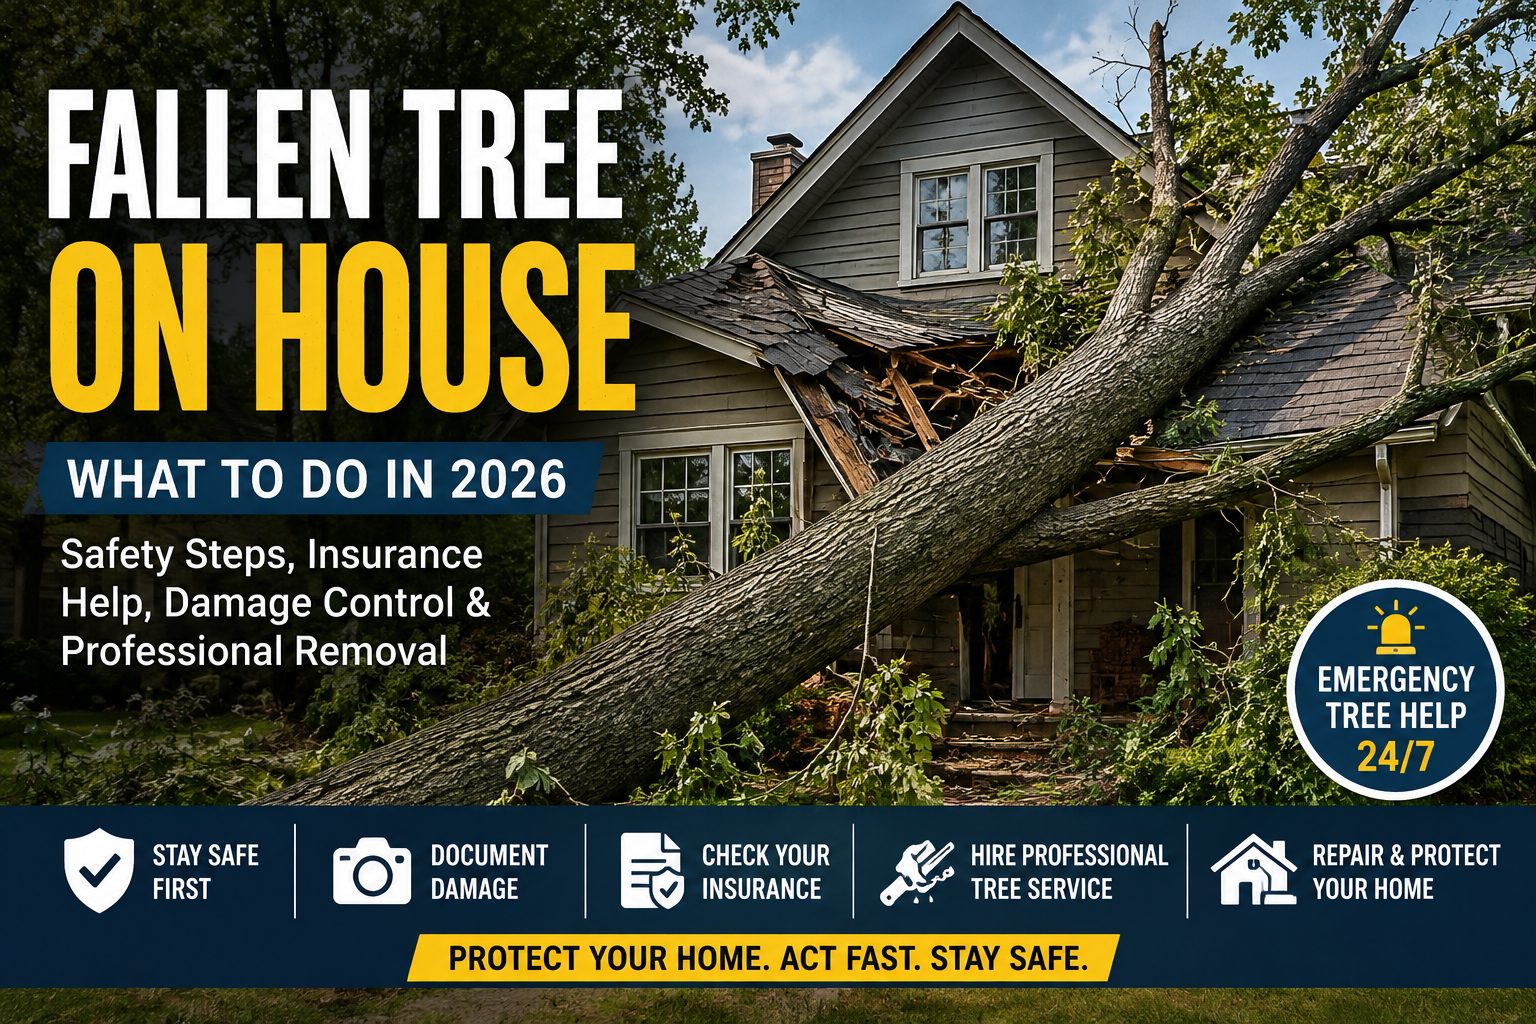
    A Fallen Tree on House can turn a normal day into a serious home emergency. Severe thunderstorms, hurricanes, tornadoes, high winds, heavy snow, and weakened trees can cause major property damage across the United States. If a tree falls on your home, knowing what to do next can protect your family, reduce additional damage, and make the insurance process easier.

    This guide explains the important steps U.S. homeowners should take after a Fallen Tree on House, including emergency safety, damage assessment, insurance, professional removal, and prevention.

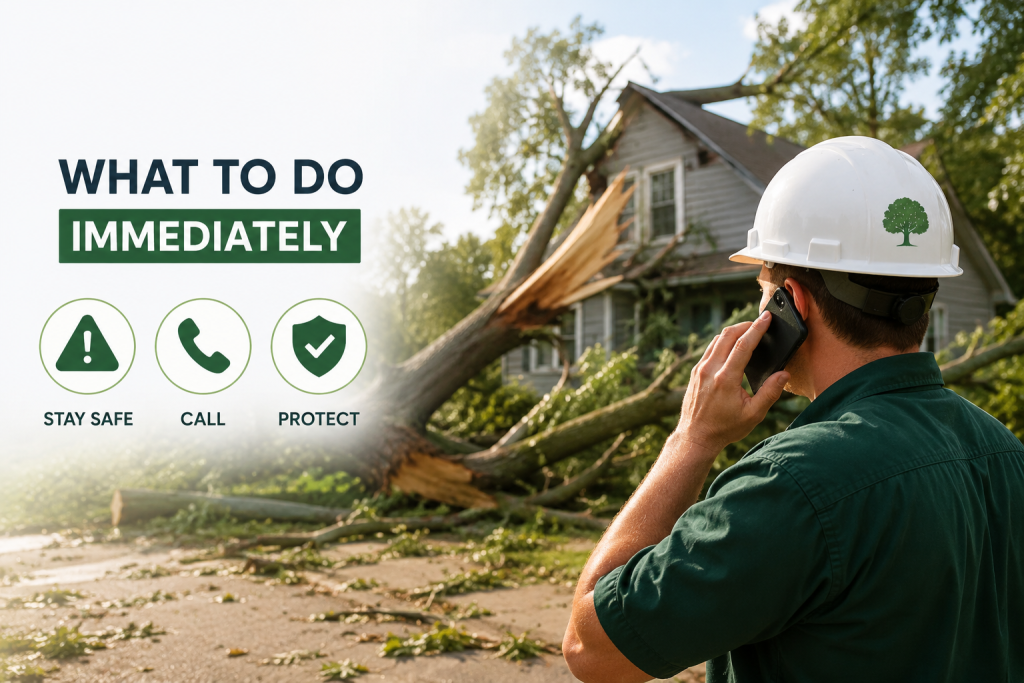
    What to Do Immediately

    Safety should always be your first priority after a Fallen Tree on House. Do not rush outside to inspect the damage if the tree is still moving, power lines are nearby, or parts of the structure appear unstable.

    Move your family and pets to a safe location. Stay away from damaged areas, broken windows, sagging ceilings, and electrical wires.

    If you see downed power lines, sparks, fire, a gas leak, serious injuries, or an immediate structural danger, contact emergency services and stay away from the affected area.

    Never climb onto the tree or roof yourself. A large tree can remain under significant pressure even after it has fallen.

    Professional tree removal expert speaking on the phone while inspecting a large tree that has fallen onto a residential home after a severe storm, highlighting the immediate safety steps homeowners should take, including staying safe, calling emergency tree removal services, and protecting the property from further damage.

    Check for Visible Damage

    Once everyone is safe, look at the property from a secure location. A Fallen Tree on House can damage much more than the roof.

    Common types of damage include:

    • Broken shingles
    • Damaged roof decking
    • Cracked rafters
    • Broken windows
    • Damaged gutters
    • Siding damage
    • Ceiling damage
    • Structural problems
    • Damaged electrical systems
    • Water intrusion

    Some damage may not be visible immediately. For example, roof or structural damage can become worse after rain enters the home.

    If you suspect structural damage, have a qualified contractor or building professional inspect the property before entering or making major repairs.

    Document the Damage

    Before cleanup begins, take photographs and videos whenever it is safe. A Fallen Tree on House should be thoroughly documented for insurance and repair purposes.

    Take pictures of the entire property as well as close-up images of damaged areas. Photograph the tree, roof, broken windows, walls, branches, fences, vehicles, and other affected property.

    Keep receipts for emergency services, temporary repairs, tree removal, tarps, boarding, and other expenses related to the incident.

    Do not throw away damaged items unless necessary for safety. Your insurance company may need evidence of the loss.

    Contact Your Homeowners Insurance Company

    After a Fallen Tree on House, contact your homeowners insurance company as soon as reasonably possible. Coverage depends on your individual policy and the cause of the tree falling.

    For example, damage caused by certain covered storms may be eligible for coverage. However, exclusions, deductibles, policy limits, and maintenance-related issues can affect a claim.

    Ask your insurer:

    • Is the property damage covered?
    • Is emergency tree removal covered?
    • What is my deductible?
    • Are temporary repairs covered?
    • Do I need an adjuster inspection?
    • What documentation is required?

    If a neighbor’s tree caused the damage, do not automatically assume the neighbor is responsible. Liability can depend on the circumstances and applicable state law.

    Hire Professional Emergency Tree Removal

    Removing a Fallen Tree on House can be extremely dangerous. A tree may be resting on the roof, tangled in electrical wires, supported by unstable branches, or putting pressure on damaged parts of the home.

    Professional tree removal companies have specialized equipment and experience for handling dangerous trees.

    Depending on the situation, professionals may use cranes, ropes, bucket trucks, chainsaws, and other specialized equipment to safely dismantle and remove the tree.

    Homeowners should avoid attempting large-scale tree removal themselves. DIY removal can result in serious injuries, additional property damage, or contact with electrical lines.

    Protect Your Home From Further Damage

    After a Fallen Tree on House, temporary protection may be necessary to prevent additional damage.

    If the roof has been opened, a qualified professional may install a temporary tarp. Broken windows can also be boarded up to keep rain and debris outside.

    If water is entering the home, move furniture and valuable belongings away from the affected area when it is safe.

    Do not climb onto a damaged roof or enter an unstable part of the house simply to protect belongings.

    How Much Does Tree Removal Cost?

    The cost of removing a Fallen Tree on House varies significantly. Factors can include tree size, location, accessibility, roof damage, electrical hazards, required equipment, and emergency service availability.

    A small tree in an open yard may be relatively simple to remove, while a large mature tree resting on a roof can require specialized equipment and multiple workers.

    Homeowners should obtain professional estimates when possible and ask whether cleanup, hauling, stump removal, and emergency services are included.

    Can Insurance Pay for Tree Removal?

    A Fallen Tree on House may involve both property-damage coverage and tree-removal coverage, depending on the homeowners policy.

    Insurance policies can differ considerably, so homeowners should review their policy and speak directly with their insurance provider.

    If the tree damaged the home during a covered event, repairs to the structure may be covered subject to the policy’s terms, limits, and deductible.

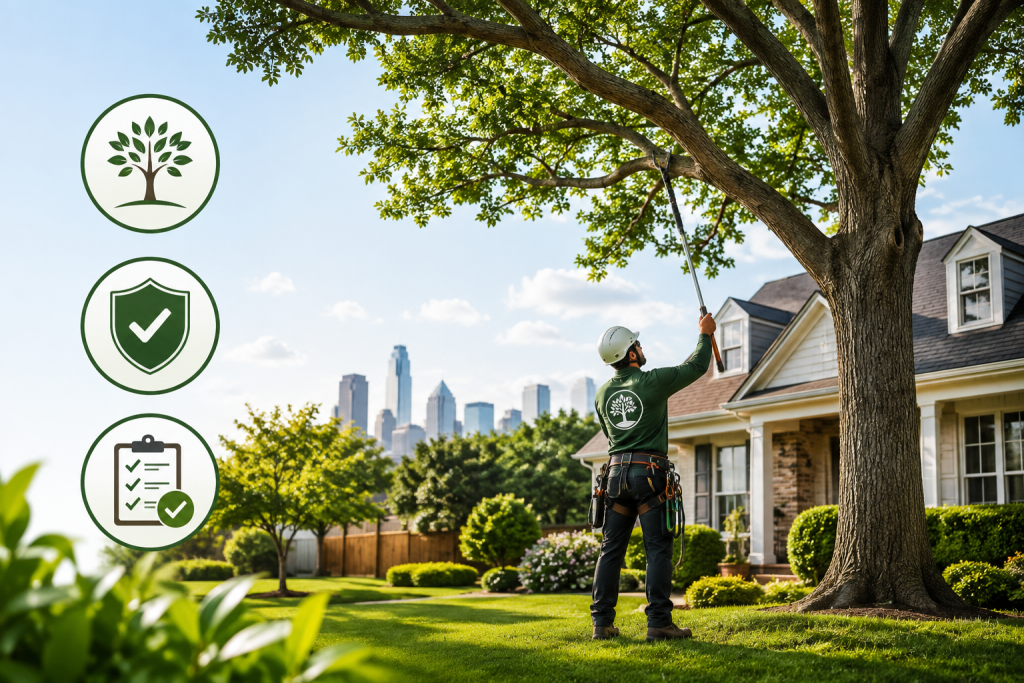
    Professional arborist performing preventive tree pruning in a well-maintained residential yard to reduce future tree emergencies, improve tree health, and protect homes from storm-related branch and tree failure.

    Prevent Future Tree Emergencies

    Preventing another Fallen Tree on House starts with regular tree maintenance.

    Homeowners should watch for:

    • Dead or hanging branches
    • Cracks in major limbs
    • Leaning trunks
    • Root damage
    • Decay or cavities
    • Weak branch connections
    • Storm damage
    • Signs of disease or pests

    Professional tree inspections can identify hazards before they become emergencies. Regular pruning can also help reduce dangerous branches around roofs, driveways, power lines, and other structures.

    Final Thoughts

    A Fallen Tree on House requires a calm and organized response. Protect people first, stay away from electrical hazards, document the damage, contact your insurance company, and hire qualified professionals for dangerous tree removal.

    For U.S. homeowners, preparing before severe weather can make a major difference. Regular inspections, proper pruning, and understanding your homeowners insurance can help reduce the risk of expensive property damage in 2026.

    FAQs

    What should I do first after a tree falls?

    Get everyone to a safe location and check for immediate hazards.

    Does homeowners insurance cover fallen trees?

    Coverage depends on your policy and the cause of the tree damage.

    Can I remove a fallen tree myself?

    Large or unstable trees should be removed by trained professionals.

    Can a fallen tree damage my roof?

    Yes. It can damage shingles, framing, gutters, ceilings, and walls.

    How can I prevent trees from falling?

    Regular inspections, pruning, and professional tree maintenance can reduce risks.

  • DIY vs Professional Stump Grinding: (2026 Guide)

    DIY vs Professional Stump Grinding: (2026 Guide)

    DIY vs Professional Stump Grinding

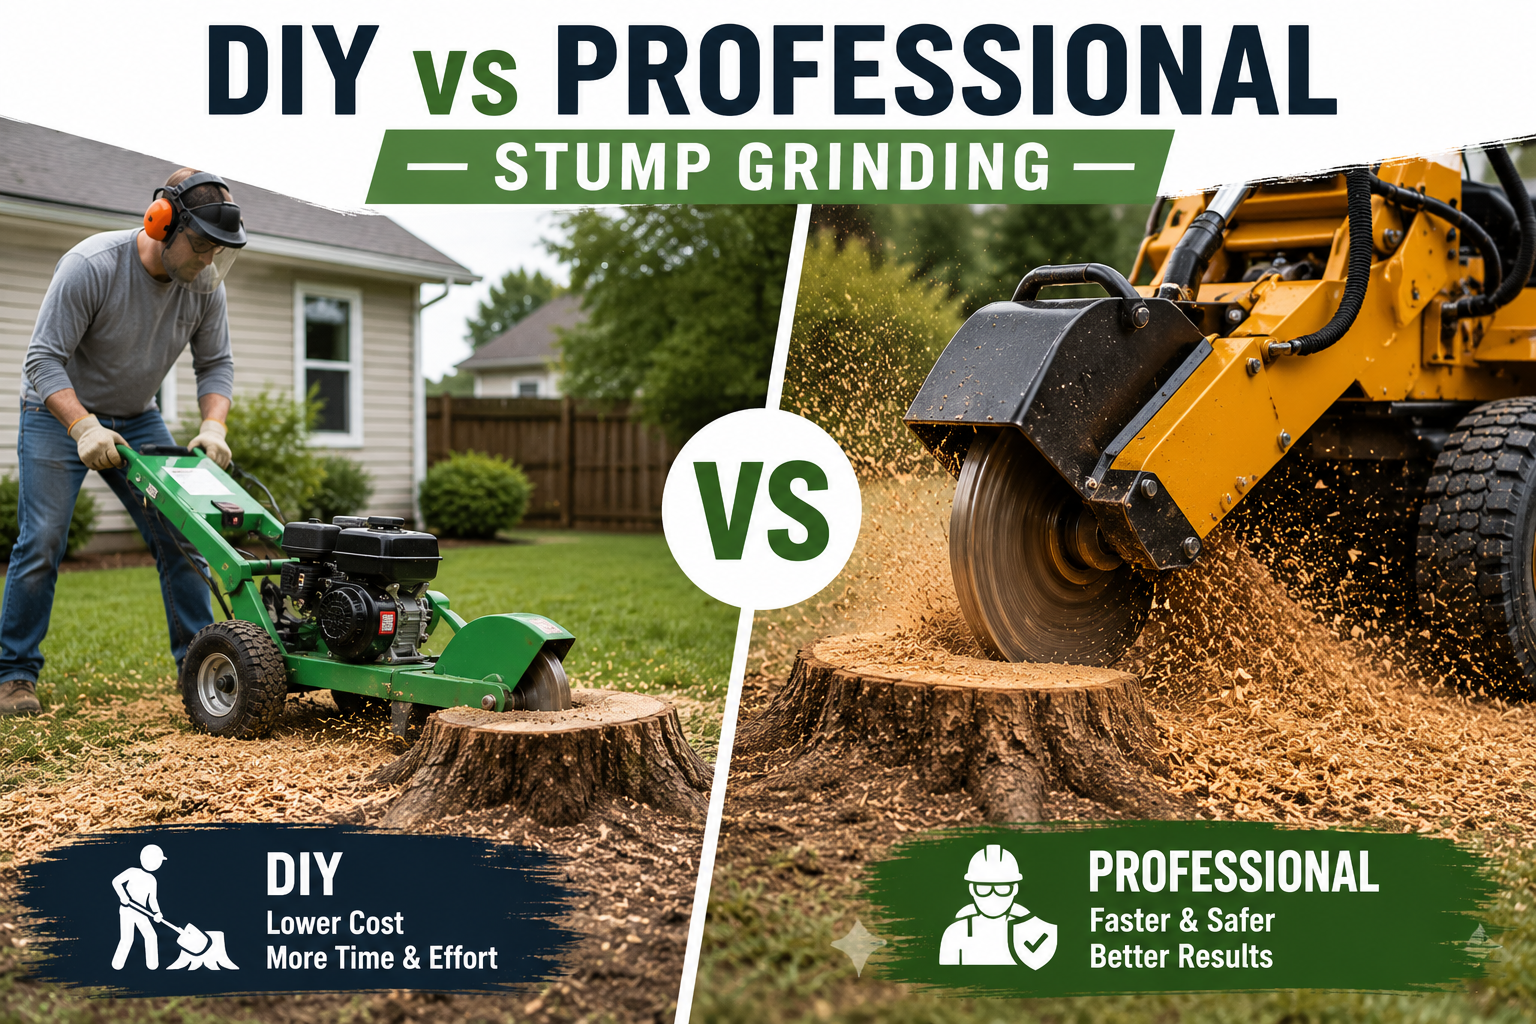
    After removing a tree, homeowners often wonder whether they should handle the remaining stump themselves or hire a professional. Understanding DIY vs Professional Stump Grinding is essential before making a decision. While renting a stump grinder may seem like a money-saving option, professional services often provide better results, improved safety, and faster completion.

    This 2026 guide explains DIY vs Professional Stump Grinding, including costs, equipment, safety concerns, and long-term value for homeowners across the United States.


    What Is Stump Grinding?

    Stump grinding is the process of removing a tree stump using a powerful grinding machine that cuts the wood into small chips. Unlike complete stump removal, grinding leaves the root system underground, where it naturally decomposes over time.

    When comparing DIY vs Professional Stump Grinding, it’s important to understand that both methods remove the visible stump, but they differ greatly in efficiency, safety, and overall results.


    DIY vs Professional Stump Grinding: What’s the Difference?

    The biggest difference between DIY vs Professional Stump Grinding is who performs the work and the equipment being used.

    DIY Stump Grinding

    DIY stump grinding involves renting a stump grinder from a local equipment rental company and completing the project yourself.

    Professional Stump Grinding

    Professional stump grinding is performed by trained tree service experts using commercial-grade equipment designed for faster, safer, and more effective stump removal.


    Pros of DIY Stump Grinding

    Many homeowners consider DIY because of the potential cost savings.

    Advantages

    • Lower upfront cost
    • Flexible work schedule
    • Suitable for small stumps
    • Opportunity to complete simple yard projects yourself

    For homeowners with landscaping experience, DIY may be practical for small and easily accessible stumps.


    Cons of DIY Stump Grinding

    Although DIY sounds appealing, it comes with several challenges.

    Disadvantages

    • Steep learning curve
    • Heavy equipment can be dangerous
    • Higher risk of personal injury
    • Possible damage to underground utilities
    • Equipment rental costs
    • Physical labor required
    • Longer completion time

    When evaluating DIY vs Professional Stump Grinding, safety should always be one of the biggest considerations.


    Benefits of Professional Stump Grinding

    Professional tree service companies bring experience and specialized equipment to every project.

    Advantages

    • Fast completion
    • Commercial-grade machinery
    • Experienced operators
    • Minimal lawn damage
    • Proper cleanup
    • Lower risk of accidents
    • Better final appearance

    For most homeowners, DIY vs Professional Stump Grinding becomes an easy decision when convenience and safety are priorities.


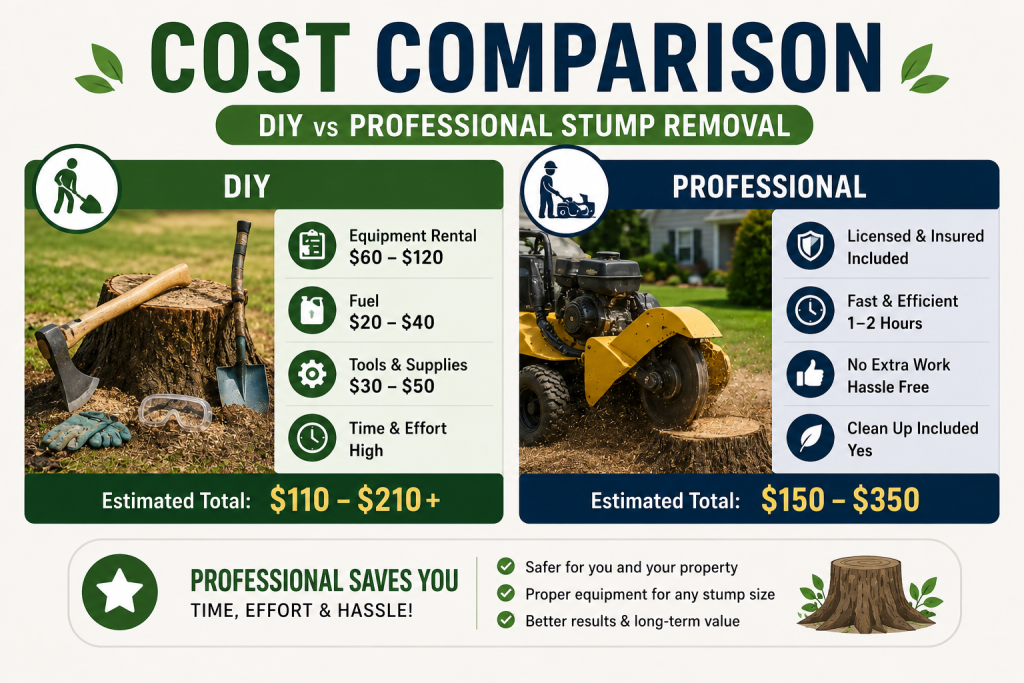
    A professional infographic comparing the cost of DIY vs. professional stump removal. The image highlights estimated expenses for equipment rental, fuel, tools, and labor while showing the advantages of hiring a professional, including licensed service, faster completion, hassle-free cleanup, and long-term value for homeowners.

    Cost Comparison

    One reason homeowners compare DIY vs Professional Stump Grinding is cost.

    DIY Costs

    • Equipment rental: $100–$300 per day
    • Fuel costs
    • Safety gear
    • Transportation fees
    • Potential repair charges

    Professional Costs

    • Small stump: $100–$200
    • Medium stump: $200–$400
    • Large stump: $400–$700+

    Although professional services may appear more expensive initially, they often provide better overall value by saving time and avoiding costly mistakes.


    Safety Considerations

    Safety is one of the most important factors when comparing DIY vs Professional Stump Grinding.

    Professional stump grinders are extremely powerful machines capable of throwing rocks, wood chips, and debris at high speeds. Improper use may result in:

    • Serious injuries
    • Property damage
    • Broken windows
    • Utility line damage
    • Equipment accidents

    Professional contractors are trained to operate these machines safely and follow industry best practices.


    Which Option Saves More Time?

    Time is another major difference in DIY vs Professional Stump Grinding.

    DIY

    • Equipment pickup
    • Learning how to operate the machine
    • Grinding
    • Cleanup
    • Equipment return

    This process may take an entire day or longer.

    Professional

    Most professional stump grinding jobs are completed within 30 minutes to 2 hours, depending on stump size and site conditions.


    When DIY Makes Sense

    DIY may be a reasonable choice if:

    • The stump is small.
    • The ground is level.
    • Equipment is easily accessible.
    • You have experience operating heavy machinery.
    • Safety risks are minimal.

    When You Should Hire a Professional

    Professional stump grinding is recommended when:

    • The stump is large.
    • Multiple stumps need removal.
    • The stump is close to buildings.
    • Underground utilities are nearby.
    • You want quick, clean results.
    • Safety is your top priority.

    For most residential properties, DIY vs Professional Stump Grinding usually favors hiring an experienced tree service company.


    A professional infographic showing essential tips before choosing a tree stump removal service. The image features a tree stump in a residential yard alongside a checklist with key factors including checking experience, verifying licenses and insurance, reading customer reviews, getting multiple quotes, and asking about available services. The green-themed design is ideal for landscaping and tree care websites targeting homeowners.

    Tips Before Choosing

    Before deciding between DIY vs Professional Stump Grinding, consider:

    • Your budget
    • Stump size
    • Tree species
    • Equipment availability
    • Time commitment
    • Physical effort
    • Safety concerns
    • Future landscaping plans

    Making the right choice depends on your experience level and the complexity of the project.


    Final Thoughts

    Choosing between DIY vs Professional Stump Grinding ultimately depends on your budget, experience, and project goals. While DIY may work well for small, uncomplicated jobs, professional stump grinding provides faster results, greater safety, and a cleaner finish.

    For most US homeowners in 2026, hiring a professional is the most reliable and cost-effective solution. Experienced tree service providers have the skills and equipment needed to complete the job efficiently while protecting your property and ensuring long-lasting results.


    Frequently Asked Questions (FAQs)

    Is DIY stump grinding cheaper than hiring a professional?

    DIY can have a lower upfront cost, but equipment rental, fuel, and potential repair expenses can reduce the savings.

    Is stump grinding dangerous?

    Yes. Stump grinders are powerful machines that require proper training and protective equipment to operate safely.

    How long does professional stump grinding take?

    Most residential stump grinding jobs take 30 minutes to 2 hours, depending on the stump size and accessibility.

    Can I rent a stump grinder?

    Yes. Many equipment rental companies across the US offer stump grinders for daily or hourly rental.

    Which option is best for large tree stumps?

    Professional stump grinding is the safest and most effective choice for large or difficult-to-access stumps.

  • Stump Grinding Cost in 2026:Best Guide For Homeowners

    Stump Grinding Cost in 2026:Best Guide For Homeowners

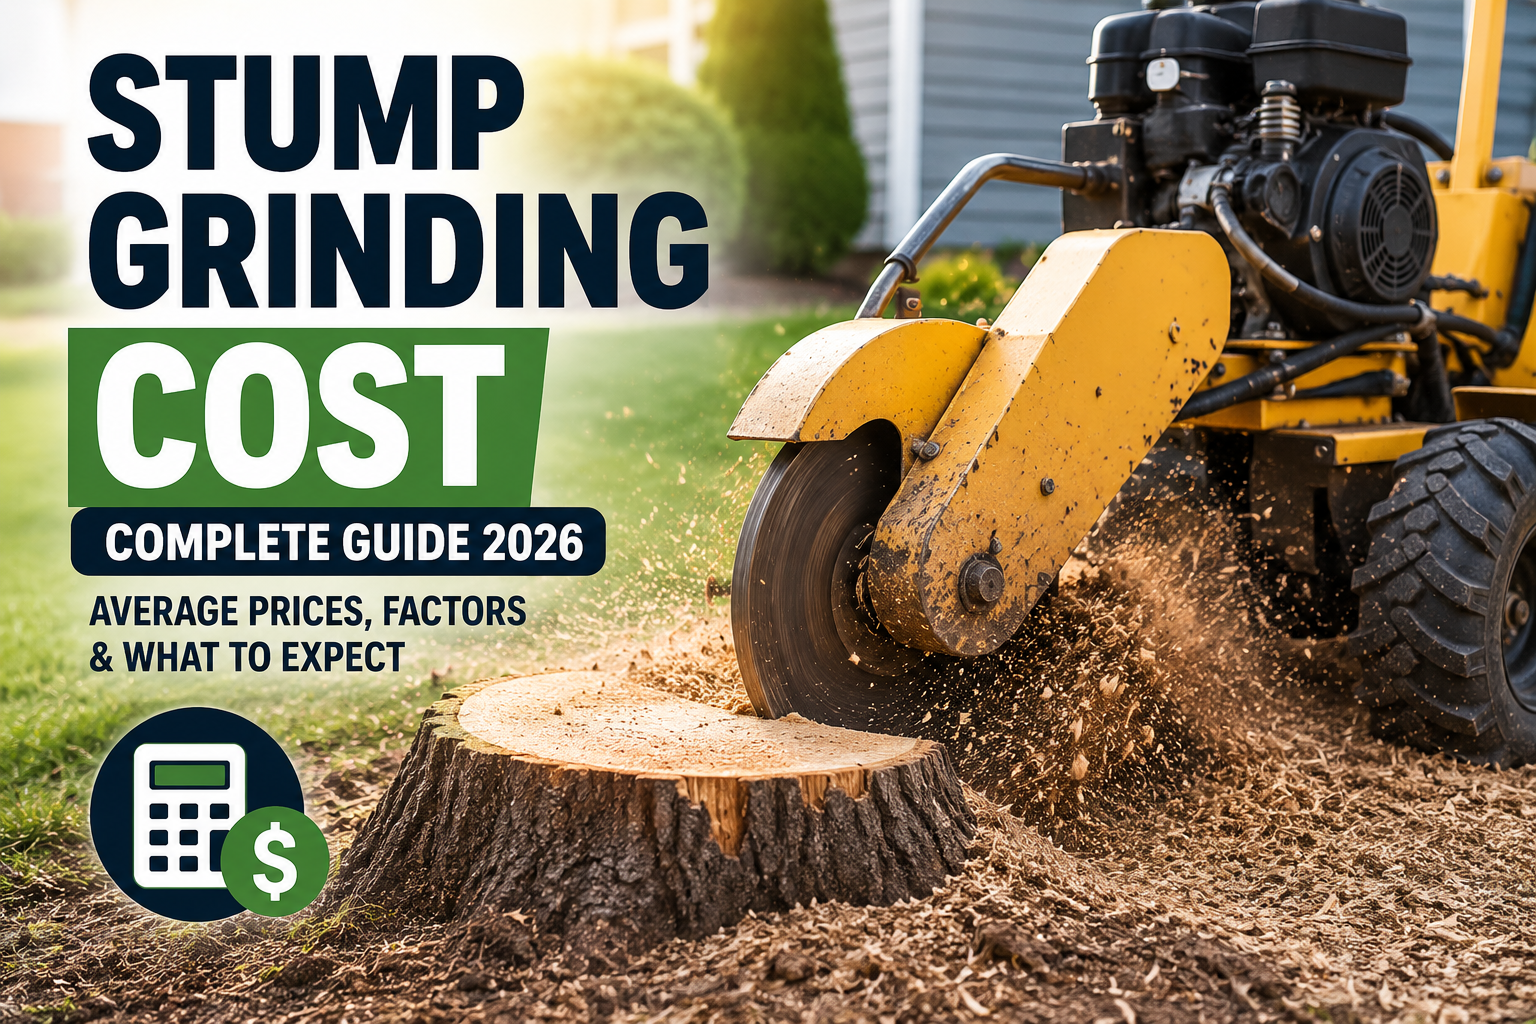
    Stump Grinding Cost in 2026: Average Prices, Factors & What to Expect

    If you have an old tree stump sitting in your yard, you may be wondering about the stump grinding cost in 2026. Stump grinding is one of the most common and affordable ways to remove an unwanted tree stump without excavating the entire root system.

    For most U.S. homeowners, stump grinding cost typically ranges from about $100 to $400 per stump, although larger stumps, difficult access, multiple stumps, and regional labor rates can increase the final price. Understanding what affects the price can help you budget for the job and compare estimates from local professionals.

    What Is Stump Grinding?

    Stump grinding involves using a specialized machine called a stump grinder to cut a tree stump below ground level. The machine uses a rotating cutting wheel to break the stump into small wood chips.

    Unlike complete stump removal, grinding usually does not require digging out the entire root system. This makes it faster, less disruptive, and often less expensive.

    After grinding, homeowners can typically cover the remaining area with soil, grass, mulch, or another landscaping material.

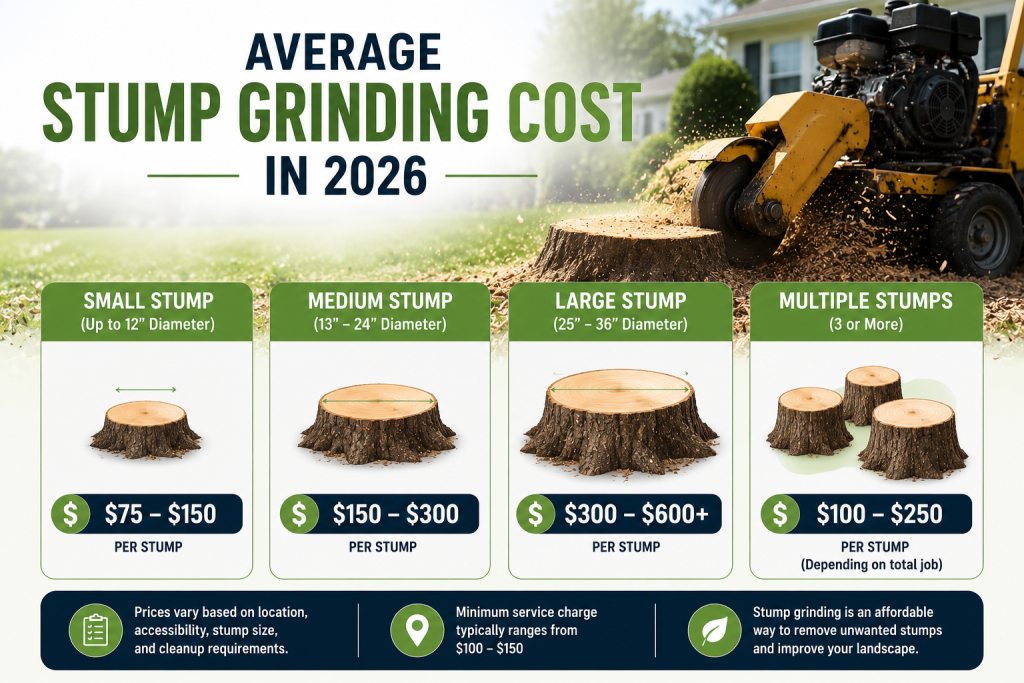
    Informative infographic showing typical stump grinding cost ranges in 2026 for small, medium, large, and multiple tree stumps, along with key factors that can affect the final price.

    Average Stump Grinding Cost in 2026

    The average stump grinding cost in the United States depends heavily on the stump’s size and location.

    Typical price ranges include:

    • Small stump: $75–$150
    • Medium stump: $150–$300
    • Large stump: $300–$600+
    • Multiple stumps: Often $100–$250 per stump, depending on the total job
    • Minimum service charge: Approximately $100–$150 in some areas

    These are general estimates rather than guaranteed prices. Local tree service companies may charge differently based on labor costs, equipment, travel distance, and the difficulty of the project.

    Factors That Affect Stump Grinding Cost

    Several factors can influence your final stump grinding cost.

    1. Stump Size

    The diameter of the stump is one of the biggest pricing factors. A small stump can usually be ground quickly, while a large stump requires more machine time and may produce significantly more debris.

    Some companies calculate prices based on stump diameter, while others provide a flat project price.

    2. Number of Stumps

    Grinding several stumps at once may reduce the average price per stump. If a tree removal project left multiple stumps throughout your property, ask the contractor whether they offer a package price.

    3. Accessibility

    A stump located in an open front yard is usually easier to grind than one behind a fence, beside a house, or in a narrow backyard.

    Limited access may require smaller equipment, additional labor, or more time, increasing the overall stump grinding cost.

    4. Stump Location

    Stumps near buildings, sidewalks, driveways, utility lines, fences, or landscaping can require additional care. Professionals may need to work more slowly to avoid damaging nearby structures.

    5. Root Flare and Surface Roots

    Some stumps have large exposed roots extending across the surrounding ground. If you want these roots ground down as well, the additional work can increase the price.

    6. Cleanup and Debris Removal

    Stump grinding produces a substantial amount of wood chips. Some companies include basic cleanup in their estimate, while others charge extra to remove the debris.

    Always ask whether the quoted price includes cleanup, hauling, and filling the hole with soil.

    Stump Grinding vs. Stump Removal

    Stump grinding and stump removal are not exactly the same service.

    Stump grinding removes the visible stump and usually grinds it several inches below the soil surface. The major roots remain underground and gradually decay.

    Stump removal involves digging out the stump and a significant portion of its root system. This process can require heavy equipment and create a larger hole in the landscape.

    For many homeowners, grinding is the more practical option because it is generally faster, less invasive, and more affordable.

    How to Save Money on Stump Grinding

    If you’re trying to reduce your stump grinding cost, consider these tips:

    • Get estimates from at least three local tree service companies.
    • Ask about discounts for grinding multiple stumps.
    • Schedule the work along with tree removal when possible.
    • Confirm whether cleanup and debris removal are included.
    • Make sure the contractor knows the approximate stump diameter before providing an estimate.
    • Clear furniture, toys, vehicles, and other obstacles from the work area.

    Avoid choosing a contractor based solely on the lowest price. Proper equipment, insurance, experience, and safe work practices are important when hiring a tree service professional.

    Is Stump Grinding Worth the Cost?

    For most homeowners, stump grinding can be worth the investment. An unwanted stump can interfere with mowing, attract insects, take up valuable yard space, and make landscaping more difficult.

    Grinding the stump can improve the appearance of your property and create usable space for grass, plants, mulch, or other landscaping projects.

    If the stump is close to a structure or underground utilities, professional service is especially important because improper grinding can cause property damage or create safety problems.

    Final Thoughts

    Understanding stump grinding cost can help U.S. homeowners make informed decisions about removing unwanted tree stumps. In 2026, a typical residential stump grinding project may cost around $100 to $400, but the actual price depends on stump size, accessibility, location, number of stumps, and cleanup requirements.

    Before hiring a tree service, compare several written estimates and confirm exactly what is included. A professional stump grinding service can remove an unsightly obstacle quickly while helping you reclaim valuable yard space.

  • Does Home Insurance Cover Tree Removal? Best Guide (2026)

    Does Home Insurance Cover Tree Removal? Best Guide (2026)

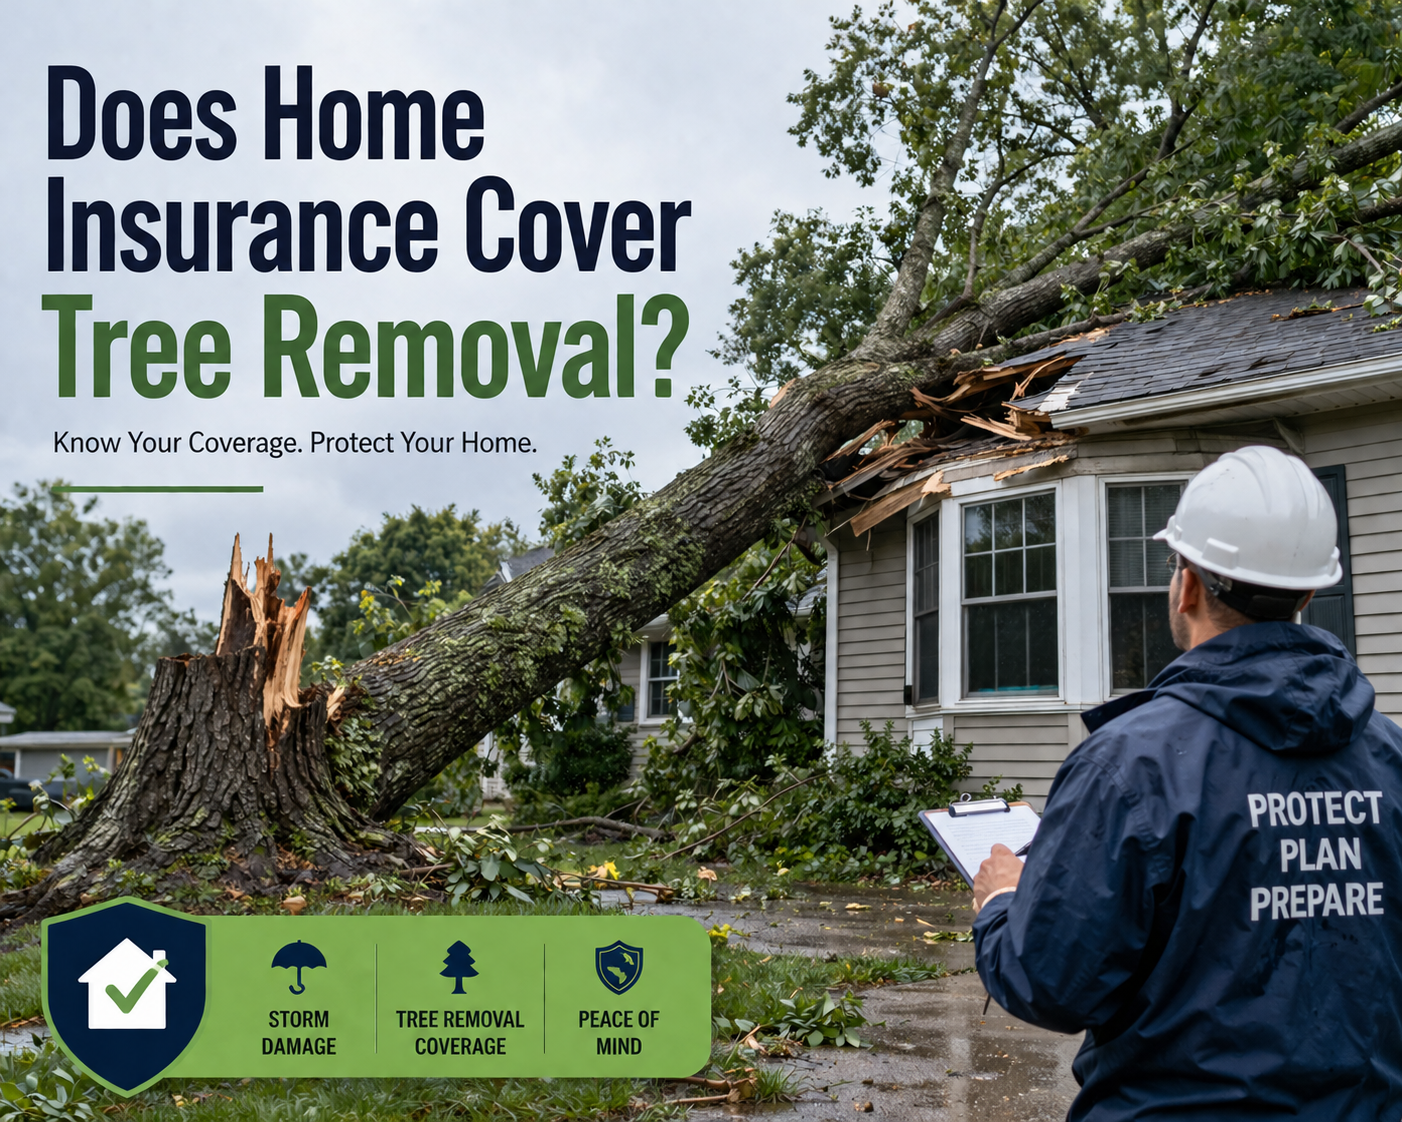
    Does Home Insurance Cover Tree Removal?

    If a tree falls on your property, one of the first questions you may ask is: Does Home Insurance Cover Tree Removal? The answer is often yes, but coverage depends on why the tree fell, where it landed, and the specific terms of your homeowners insurance policy.

    In many situations, homeowners insurance may cover the cost of removing a fallen tree when the tree damages a covered structure, such as your home, garage, or fence. However, insurance policies do not automatically cover every type of tree removal. This 2026 guide explains Does Home Insurance Cover Tree Removal, when coverage may apply, and what U.S. homeowners should know before filing a claim.

    Does Home Insurance Cover Tree Removal After a Storm?

    A common situation where Does Home Insurance Cover Tree Removal becomes important is after a severe storm. High winds, lightning, hurricanes, tornadoes, and heavy snow can cause trees to fall unexpectedly.

    If a covered storm causes a tree to fall and damage your home or another covered structure, your homeowners insurance may help pay for the necessary removal. Your policy may also cover repairs to the damaged structure, subject to your deductible and coverage limits.

    However, the exact coverage depends on your policy language. Always review your policy or contact your insurance company after significant property damage.

    When Does Home Insurance Cover Tree Removal?

    In general, Does Home Insurance Cover Tree Removal depends on whether the tree caused covered property damage.

    Insurance may cover tree removal when a fallen tree:

    • Damages your house
    • Falls on a detached garage
    • Damages a covered fence
    • Blocks a driveway after causing covered damage
    • Falls on another insured structure

    Some policies may also provide limited coverage for removing a tree that blocks access to a driveway or wheelchair ramp, even when the tree does not damage a structure. This type of coverage often has specific limits and conditions.

    When Does Home Insurance Not Cover Tree Removal?

    Understanding when Does Home Insurance Cover Tree Removal does not apply is equally important.

    Homeowners insurance may not cover removal when:

    • The tree falls without damaging insured property
    • The tree was dead or neglected before the incident
    • The removal is considered routine maintenance
    • The tree is removed only because it is considered dangerous
    • The tree falls due to an excluded event
    • The damage is below your policy deductible

    For example, if a healthy tree falls in your backyard during a storm but does not damage your home, your policy may not pay for removing it. In this situation, the cost may be the homeowner’s responsibility.

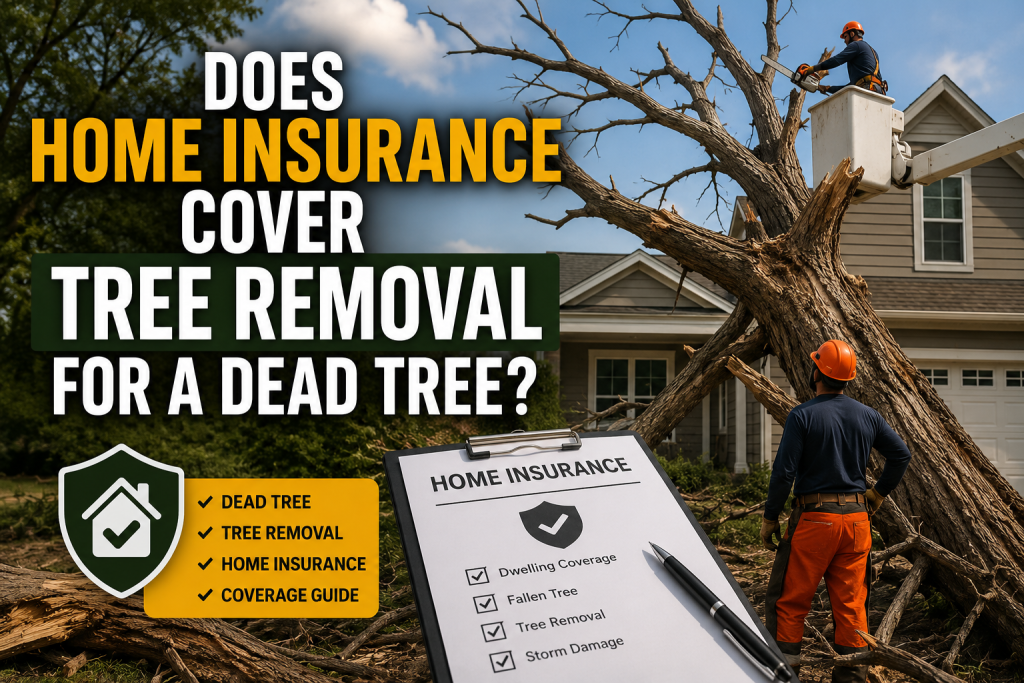
    A professional tree removal crew safely removes a large dead tree near a residential home, illustrating home insurance coverage considerations for dead tree removal and fallen tree damage.

    Does Home Insurance Cover Tree Removal for a Dead Tree?

    Many homeowners ask Does Home Insurance Cover Tree Removal when they have a dead or diseased tree on their property.

    Usually, homeowners insurance is designed to cover sudden and unexpected damage rather than routine maintenance. If a tree is clearly dead, diseased, or dangerously weakened and the homeowner fails to address the problem, an insurer may deny a claim in certain circumstances.

    This is why regular tree inspections and professional maintenance are important. Removing a hazardous tree before it falls may prevent expensive property damage.

    Does Home Insurance Cover Tree Removal After Lightning or Wind?

    A tree damaged by lightning, strong winds, or another covered weather event may qualify for coverage if it falls and causes covered damage.

    Whether Does Home Insurance Cover Tree Removal applies depends on the specific cause of loss and your policy’s covered-perils section. Some policies may cover certain storm-related events while excluding others.

    After a storm, take photographs of the damage, avoid dangerous areas, and contact your insurance provider for instructions.

    How Much Tree Removal Does Insurance Usually Cover?

    Coverage limits vary significantly between insurance policies. Some homeowners policies may provide limited tree removal coverage, while others may offer additional coverage through endorsements.

    Your deductible also matters. If the cost of tree removal is less than your deductible, filing a claim may not provide a financial benefit.

    Before hiring a tree removal company, ask your insurance provider:

    1. Is the tree removal covered?
    2. What caused the tree to fall?
    3. Is there a coverage limit?
    4. Does my deductible apply?
    5. Is emergency tree removal covered?
    6. Do I need an approved contractor?

    What Should You Do If a Tree Falls on Your Property?

    If you are wondering Does Home Insurance Cover Tree Removal, follow these steps after a tree falls:

    1. Protect Your Safety

    Stay away from fallen trees near power lines or unstable structures. Contact the utility company if electrical lines are involved.

    2. Document the Damage

    Take clear photographs and videos of the tree, damaged property, and surrounding area.

    3. Contact Your Insurance Company

    Report the damage as soon as possible and ask what documentation is required.

    4. Hire a Qualified Tree Professional

    A professional tree removal company can safely remove the tree and help prevent additional property damage.

    5. Keep Receipts and Records

    Save estimates, invoices, photographs, and communication related to the claim.

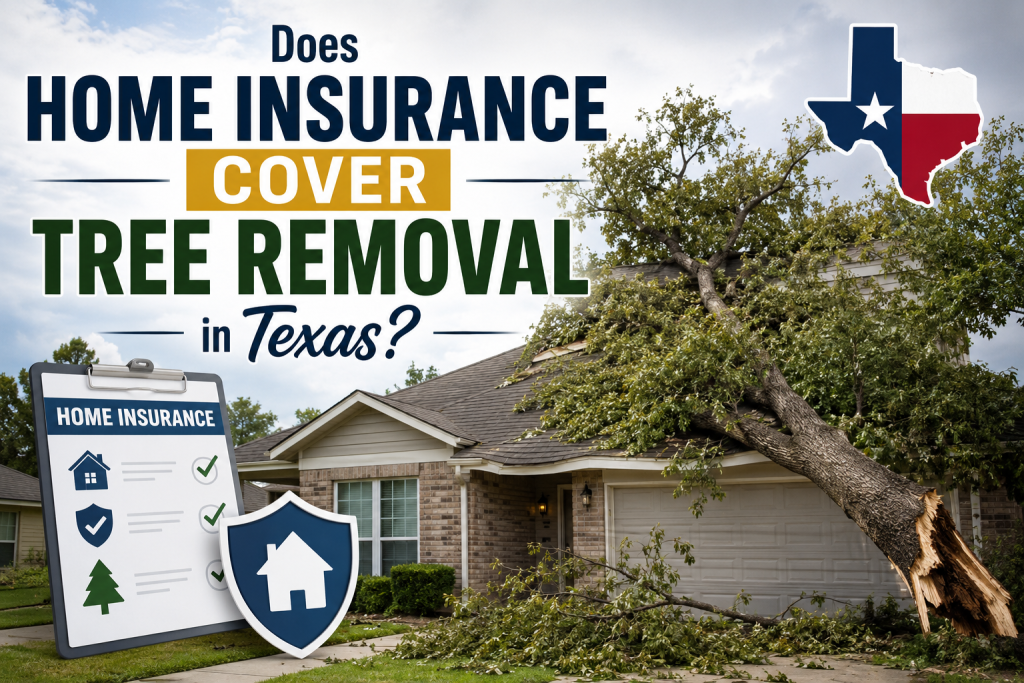
    A Texas suburban home with a large fallen tree after storm damage, illustrating whether homeowners insurance covers tree removal costs in Texas.

    Does Home Insurance Cover Tree Removal in Texas?

    Texas homeowners should pay close attention to their individual insurance policies because coverage can vary based on the insurer, policy type, deductible, and cause of damage.

    Severe thunderstorms, high winds, hail, and other weather events can create significant tree hazards. If a tree falls and damages an insured structure, coverage may be available depending on the policy terms.

    For Dallas-area homeowners, it is especially important to review your policy before an emergency occurs and understand whether emergency tree removal services are covered.

    Final Answer: Does Home Insurance Cover Tree Removal?

    So, Does Home Insurance Cover Tree Removal? In many cases, homeowners insurance may cover tree removal when a covered event causes a tree to fall and damage an insured structure. However, coverage is not automatic, and limits, exclusions, and deductibles can apply.

    The best way to determine Does Home Insurance Cover Tree Removal for your specific situation is to review your policy and contact your insurance provider. If a tree has already fallen, document the damage, prioritize safety, and follow your insurer’s claim instructions.

    For U.S. homeowners, understanding your insurance coverage before a tree emergency can help reduce confusion, delays, and unexpected expenses.

  • Tree Removal Safety Tips (2026 Guide for U.S. Homeowners)

    Tree Removal Safety Tips (2026 Guide for U.S. Homeowners)

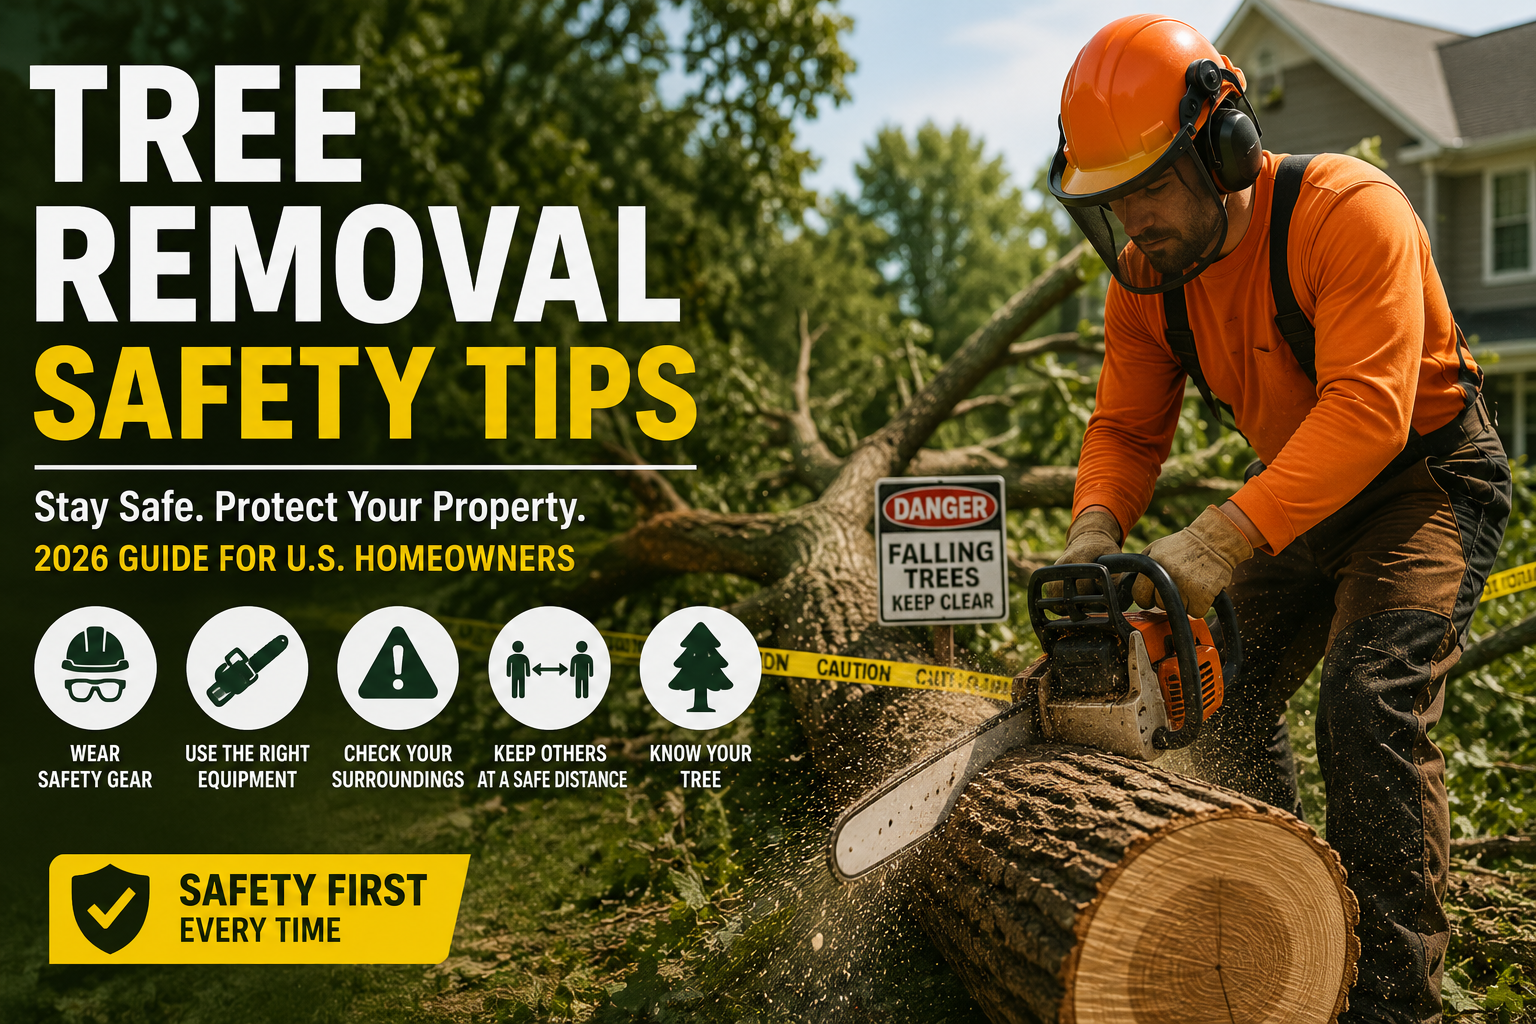
    Tree Removal Safety Tips

    Trees improve the beauty, shade, and value of any property. However, when a tree becomes diseased, damaged, or unstable, removing it safely becomes essential. Following the right Tree Removal Safety Tips can prevent injuries, protect your home, and reduce costly damage.

    Whether you’re dealing with a dead tree after a storm or planning a landscaping project, understanding safe removal practices is critical. This 2026 guide is designed specifically for U.S. homeowners and explains everything you need to know before cutting down a tree.


    Why Tree Removal Safety Matters

    Tree removal is one of the most dangerous outdoor tasks. Falling branches, unstable trunks, power lines, and chainsaw accidents can all lead to severe injuries or property damage.

    Following proper Tree Removal Safety Tips helps you:

    • Prevent accidents and injuries
    • Protect nearby buildings and vehicles
    • Avoid electrical hazards
    • Reduce property damage
    • Complete projects safely and efficiently

    Inspect the Tree Before Removal

    The first step in safe tree removal is a complete inspection.

    Look for:

    • Dead or hanging branches
    • Large cracks in the trunk
    • Leaning trees
    • Hollow sections
    • Signs of disease or decay
    • Nearby power lines

    One of the most important Tree Removal Safety Tips is never assuming a tree will fall in the direction you expect.


    Wear Proper Safety Equipment

    Personal protective equipment (PPE) is essential.

    Always wear:

    • Safety helmet
    • Eye protection
    • Hearing protection
    • Chainsaw-resistant gloves
    • Cut-resistant chaps
    • Steel-toe boots
    • Long sleeves and durable pants

    These Tree Removal Safety Tips significantly reduce the risk of injury.


    Keep a Safe Work Area

    Before cutting begins:

    • Remove vehicles from the area.
    • Keep children and pets indoors.
    • Clear obstacles from escape routes.
    • Mark a safety perimeter.

    Professional arborists often keep people at least twice the tree’s height away from the work zone.

    Following these Tree Removal Safety Tips keeps everyone protected.


    Never Remove Trees Near Power Lines

    Electricity is one of the biggest hazards during tree removal.

    If branches touch or are close to utility lines:

    • Do not climb the tree.
    • Do not use ladders.
    • Do not attempt DIY removal.
    • Contact your local utility company.
    • Hire a licensed tree removal company.

    Ignoring this important Tree Removal Safety Tips guideline could be life-threatening.


    Plan the Tree’s Falling Direction

    Before making the first cut:

    • Check the natural lean.
    • Evaluate wind direction.
    • Look for nearby structures.
    • Identify escape routes.
    • Remove obstacles from the landing zone.

    Proper planning is one of the smartest Tree Removal Safety Tips homeowners can follow.


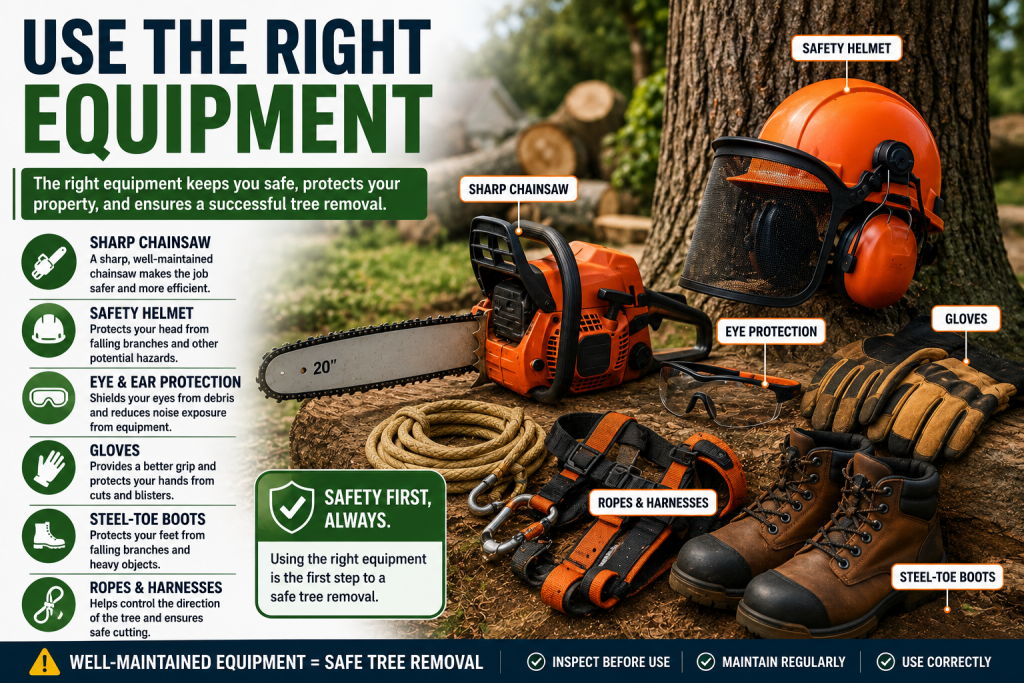
    Essential tree removal equipment including chainsaw, helmet, gloves, eye protection, ropes, and steel-toe boots.

    Use the Right Equipment

    Never use damaged tools.

    Recommended equipment includes:

    • Sharp chainsaw
    • Felling wedges
    • Safety ropes
    • Helmet
    • First-aid kit
    • Fuel stored safely

    Using proper equipment is a fundamental part of effective Tree Removal Safety Tips.


    Avoid Working Alone

    Tree removal should never be a one-person job.

    Always have someone nearby who can:

    • Watch for hazards
    • Call emergency services if needed
    • Assist with equipment
    • Monitor the tree’s movement

    One of the best Tree Removal Safety Tips is ensuring another adult is present throughout the project.


    Watch the Weather

    Weather affects tree stability.

    Avoid removing trees during:

    • Strong winds
    • Heavy rain
    • Thunderstorms
    • Snow or ice
    • Poor visibility

    Good weather makes following Tree Removal Safety Tips much easier and safer.


    Know When to Hire Professionals

    Some trees should always be handled by certified experts.

    Hire professionals if:

    • The tree is over 30 feet tall.
    • It leans toward your home.
    • It is storm-damaged.
    • It has split trunks.
    • It is close to power lines.
    • Heavy equipment is required.

    Professional crews have training, insurance, and specialized equipment that make tree removal much safer.


    Common Mistakes to Avoid

    Many homeowners make avoidable mistakes.

    Do not:

    • Stand directly behind the tree
    • Cut without an escape route
    • Ignore tree lean
    • Work with dull chainsaws
    • Remove trees during storms
    • Climb trees with chainsaws
    • Leave broken limbs hanging

    Avoiding these mistakes is one of the most valuable Tree Removal Safety Tips for beginners.


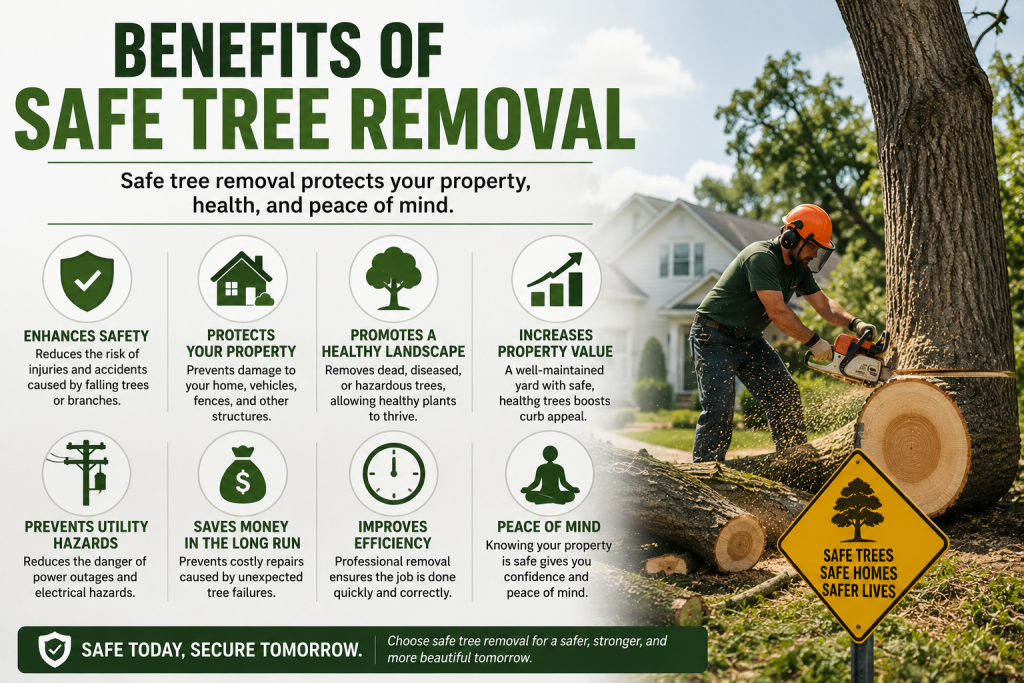
    Infographic showing the benefits of safe tree removal, including improved safety, property protection, healthy landscaping, and peace of mind.

    Benefits of Safe Tree Removal

    Following proper safety practices provides several advantages.

    Benefits include:

    • Safer working conditions
    • Lower injury risk
    • Reduced property damage
    • Better control of tree direction
    • Faster cleanup
    • Protection of nearby landscaping
    • Peace of mind

    These Tree Removal Safety Tips help homeowners complete projects with greater confidence.


    Final Thoughts

    Tree removal may appear straightforward, but it carries significant risks. Every year, thousands of Americans suffer injuries during unsafe tree removal attempts. By following these proven Tree Removal Safety Tips, inspecting trees carefully, wearing protective gear, using the proper equipment, and recognizing when to call professionals, you can greatly reduce those risks.

    If you’re unsure about any part of the job, hiring an experienced tree removal service is often the safest and most cost-effective decision. In 2026, safety should always come before saving time or money.


    Frequently Asked Questions (FAQs)

    1. What are the most important Tree Removal Safety Tips?

    Inspect the tree, wear protective gear, use proper equipment, keep people away, plan the fall direction, and never work near power lines without professional assistance.

    2. Can I remove a large tree myself?

    Small trees may be manageable, but large, leaning, damaged, or diseased trees should be removed by licensed professionals.

    3. Is tree removal dangerous?

    Yes. Tree removal involves chainsaws, heavy branches, falling trunks, and electrical hazards, making it one of the most hazardous outdoor tasks.

    4. What safety equipment is required?

    A helmet, eye and hearing protection, chainsaw chaps, gloves, steel-toe boots, and sturdy clothing are essential.

    5. When should I hire a professional tree removal company?

    Hire a professional if the tree is large, close to power lines or buildings, storm-damaged, or if you lack the experience or equipment to remove it safely.